AI Agent Deployment Workflow
This guide walks you through the step-by-step process of deploying an MCP Server or AI Agent on NexaStack.
Follow each section carefully to ensure smooth setup — from configuring the Git repository or uploading a zip file, to defining resource requirements and monitoring deployment status.
Objective
By the end of this guide, you will learn how to:
- Add and configure an AI Agent in NexaStack.
- Connect with a Git repository or upload a packaged zip file.
- Set up resource requirements and deployment preferences.
- Verify successful deployment status.
Step 1: Login to the Platform
- Open the NexaStack login page.
- Enter your workspace credentials — email and password.
- Click Login to access the platform.
Always log in via a secure HTTPS connection and never share your credentials publicly.
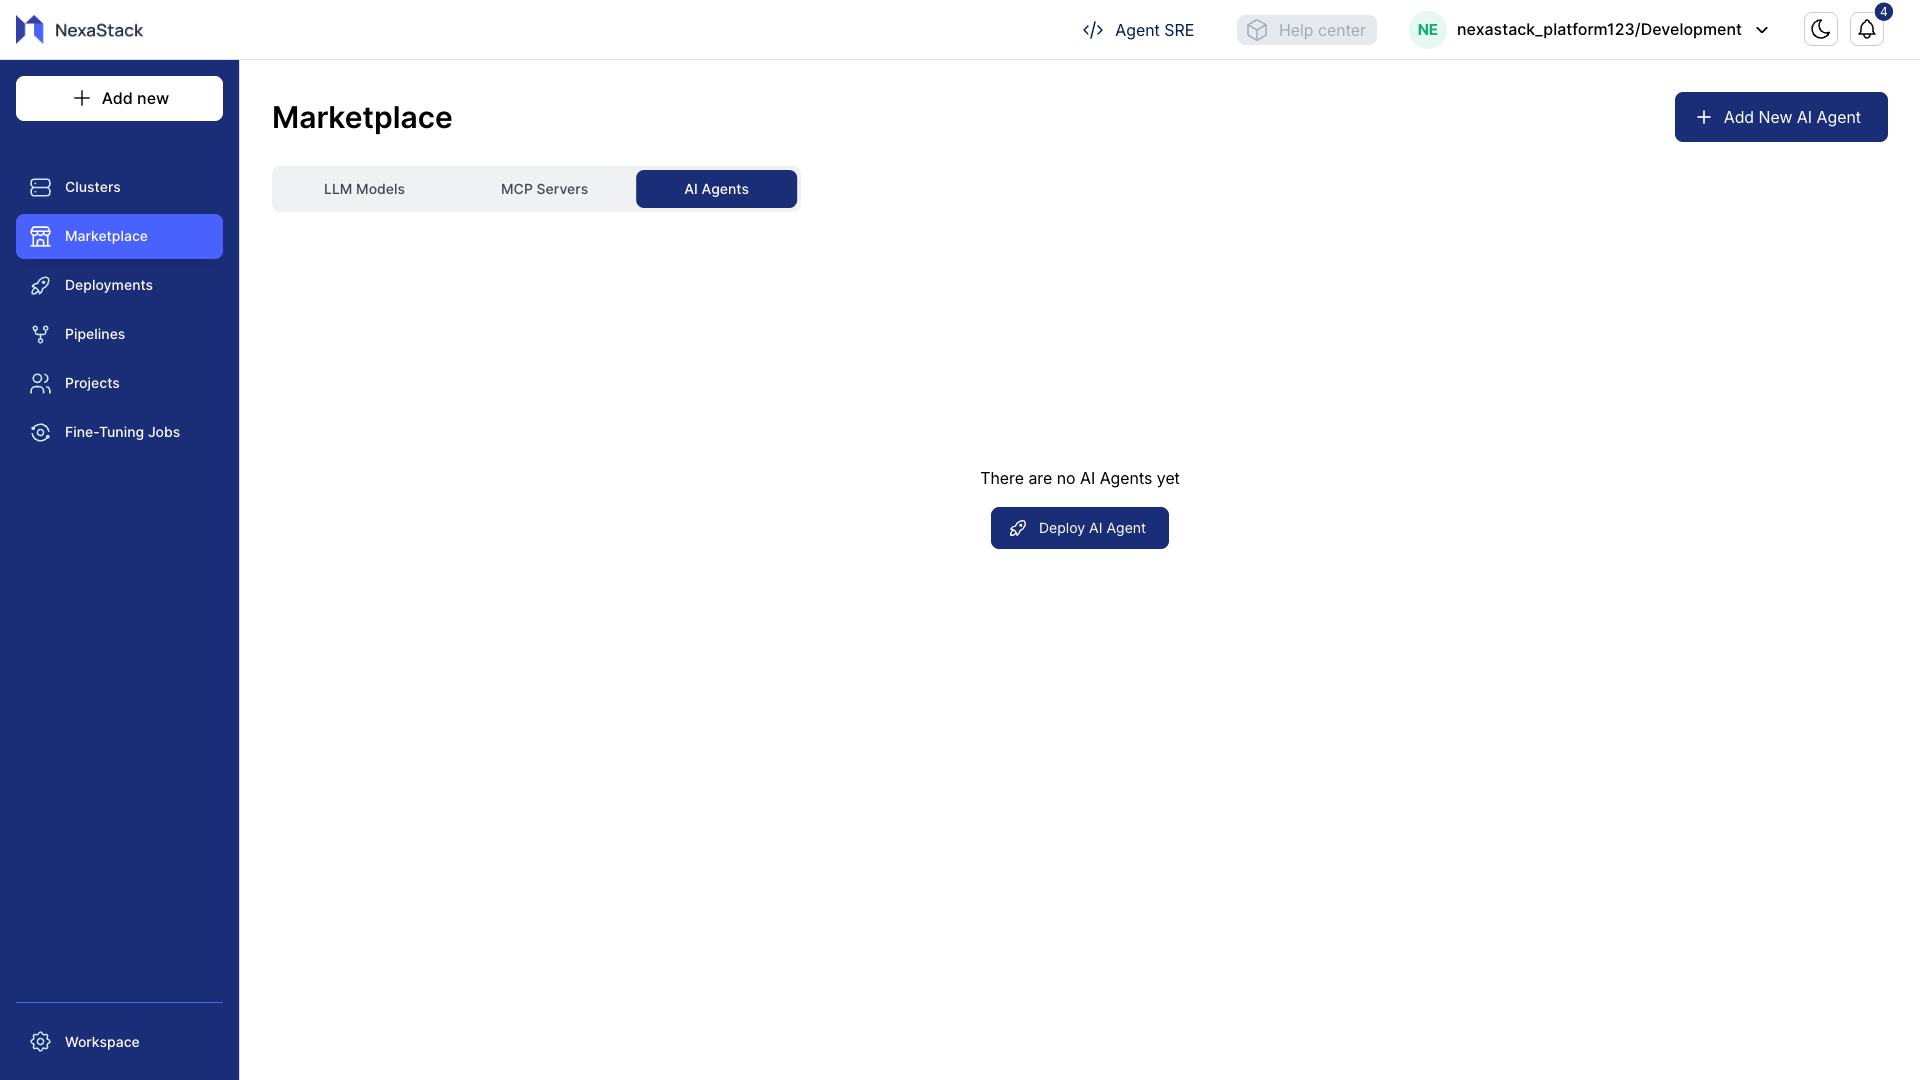
Step 2: Navigate to the MCP Servers Section
- From the left sidebar, go to MarketPlace.
- Click on the AI Agents tab — this lists all available MCP Servers and AI Agents.
- Ensure the Add New AI Agent button is visible at the top-right.
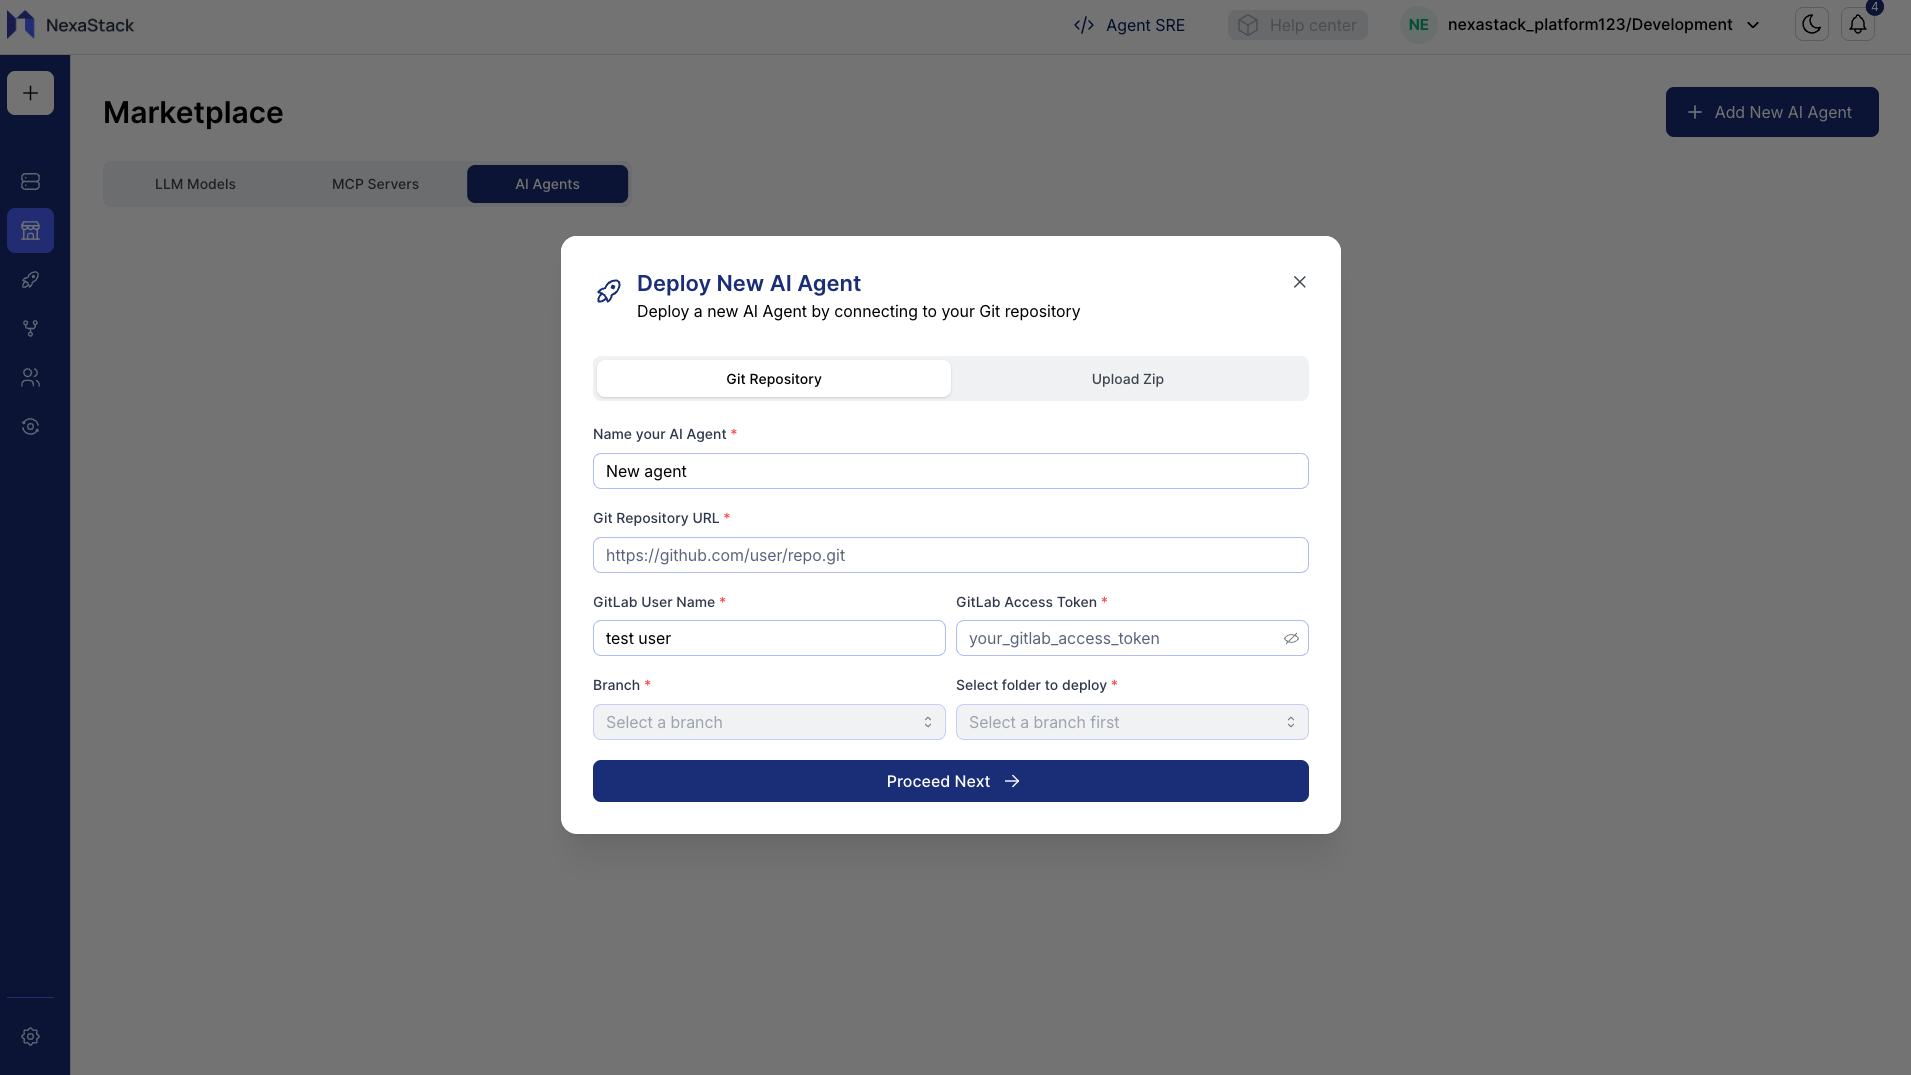
Step 3: Add a New AI Agent
When you click Add New AI Agent, a configuration form appears.
This form collects essential information about the AI Agent and its repository.
Fill in the Form Details
| Field | Description |
|---|---|
| Agent Name | Unique identifier for your AI Agent |
| Git Repository URL | Repository where the agent code resides |
| GitLab Username | Username used for repository access |
| Access Token | Personal access token for authentication |
| Branch | The branch to deploy from (auto-detected) |
- The repository must follow a mono-architecture structure (all AI components in one repo).
- Once you add your Repo URL, Username, and Token, available branches will auto-populate.
- NexaStack automatically detects the AI Agent structure from the repo to validate deployment readiness.
Step 4: Upload AI Agent Zip File (Alternative to Git)
If you are not using a Git repository, you can deploy the agent by uploading a packaged zip file.
- Click Upload Zip.
- Select your AI Agent zip file (e.g.,
backlogs_planning.zip) from your local system. - Click Upload File to start uploading.
- Wait until you see the confirmation message:
“Agent Zip file uploaded” - Once uploaded, click Proceed Next to continue.
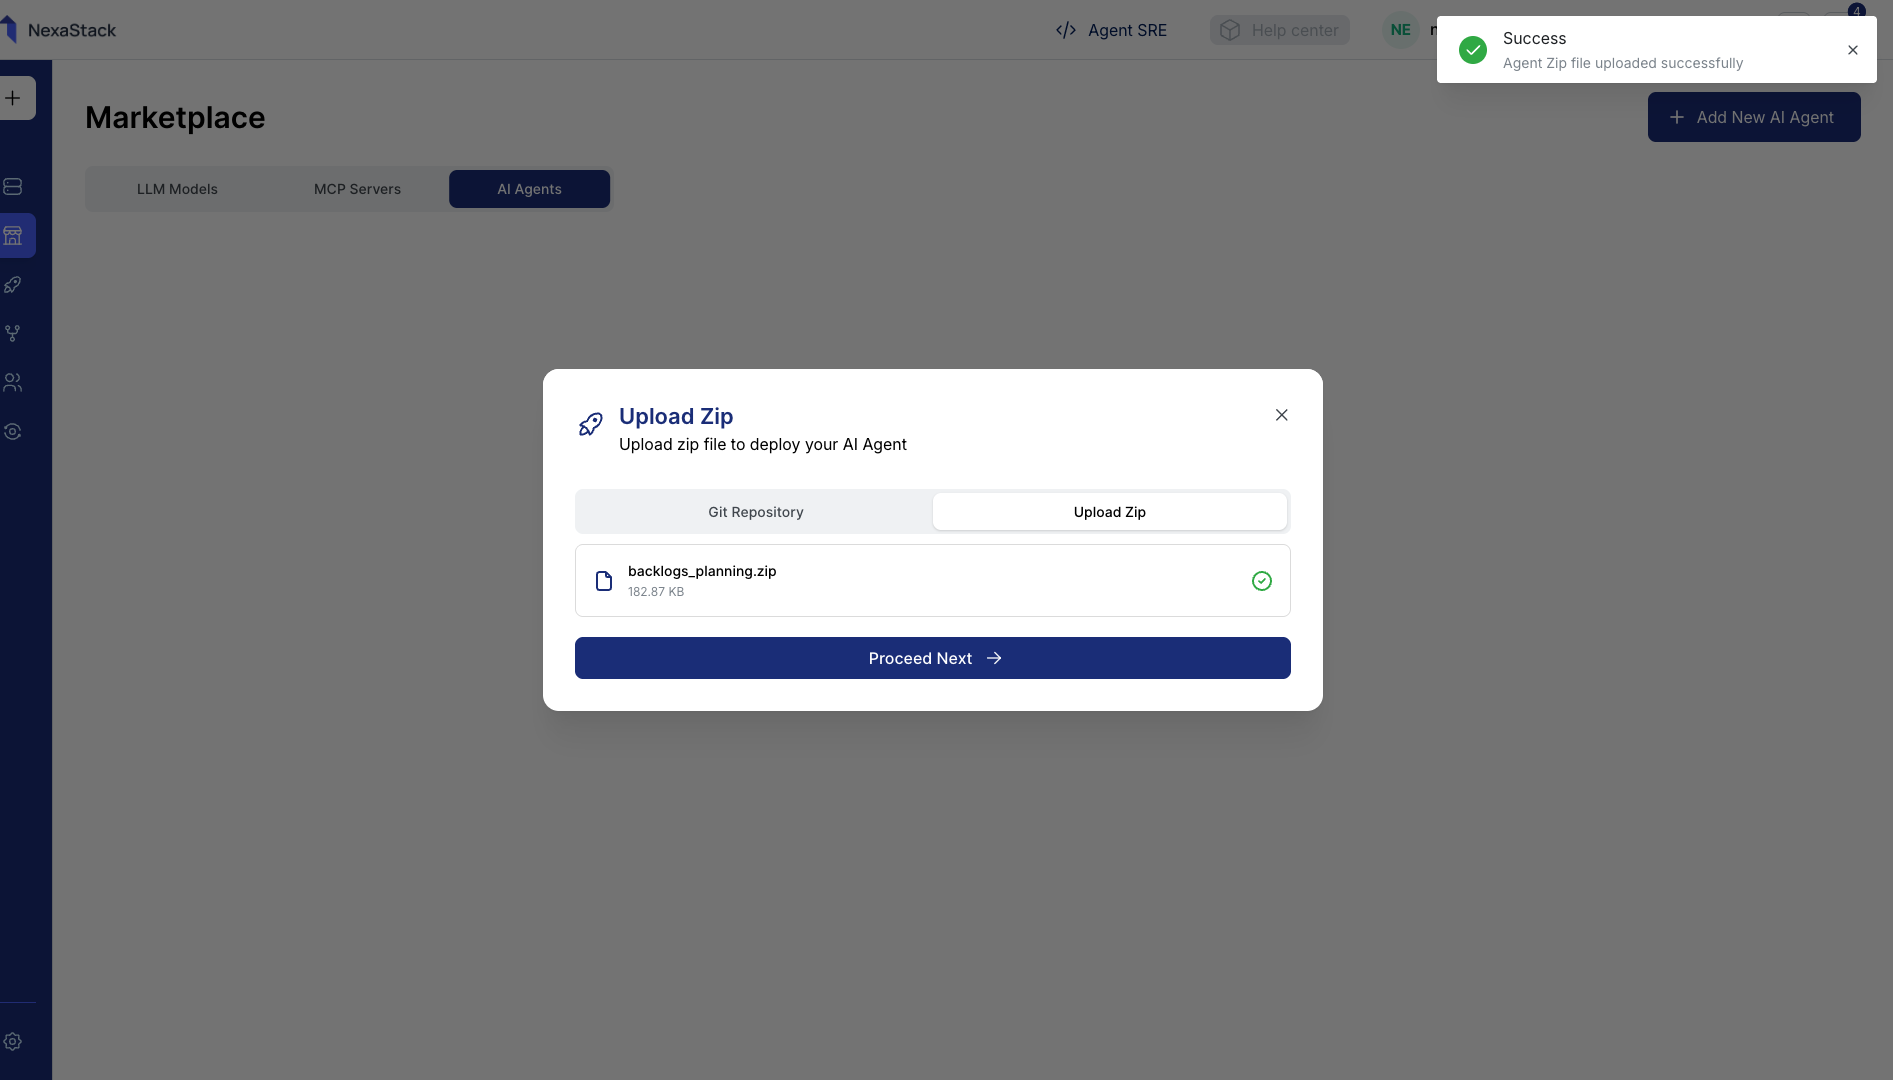
Ensure your zip file includes all essential dependencies, configuration files, and a valid manifest.
Incomplete packages can result in deployment failure.
Step 5: Select the MCP Server
After the upload or repository setup, you’ll need to link your AI Agent with an MCP Server.
If you don’t have an MCP Server available, follow the step-by-step guide to deploy one:
👉 Deploy MCP Server
- From the MCP Server List, select your preferred server (e.g.,
MCP Odoo). - Click Next to proceed to environment configuration.
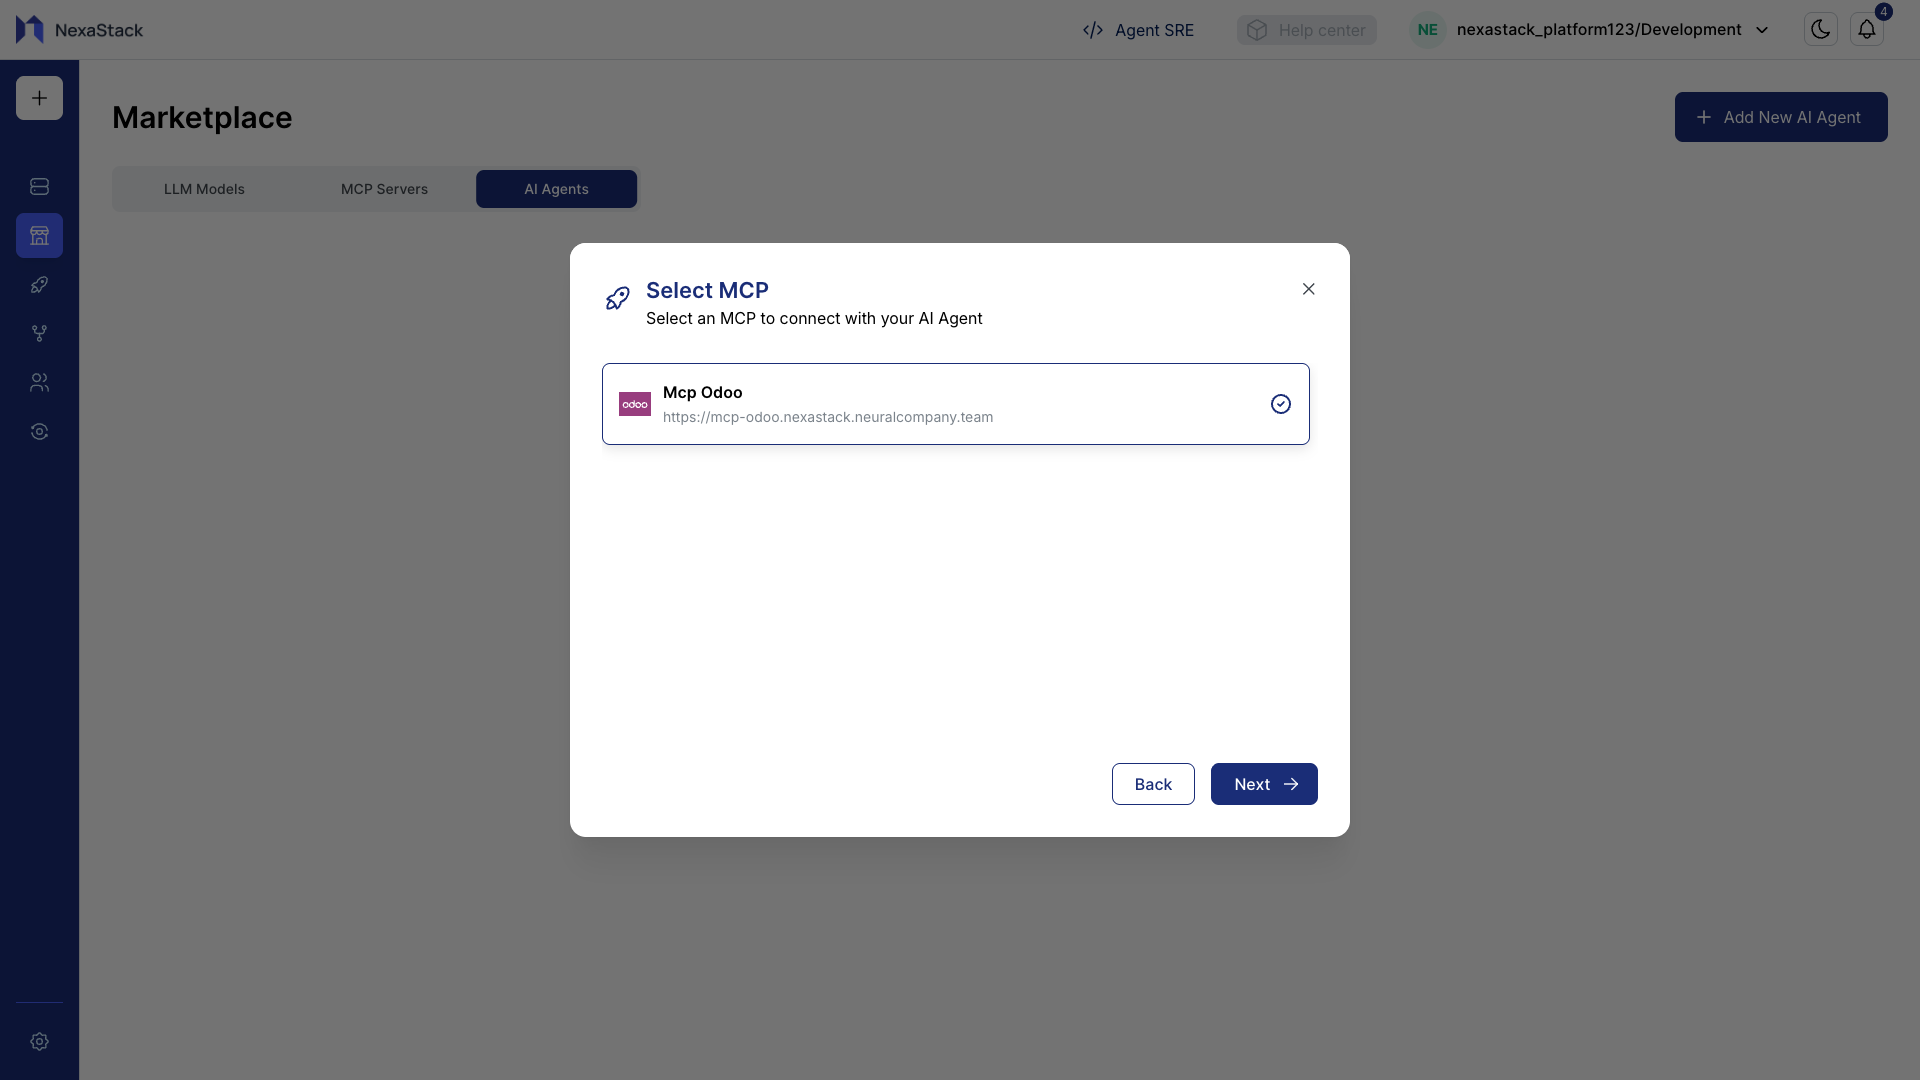
Each AI Agent must be mapped to an MCP Server that manages its lifecycle, resource orchestration, and monitoring.
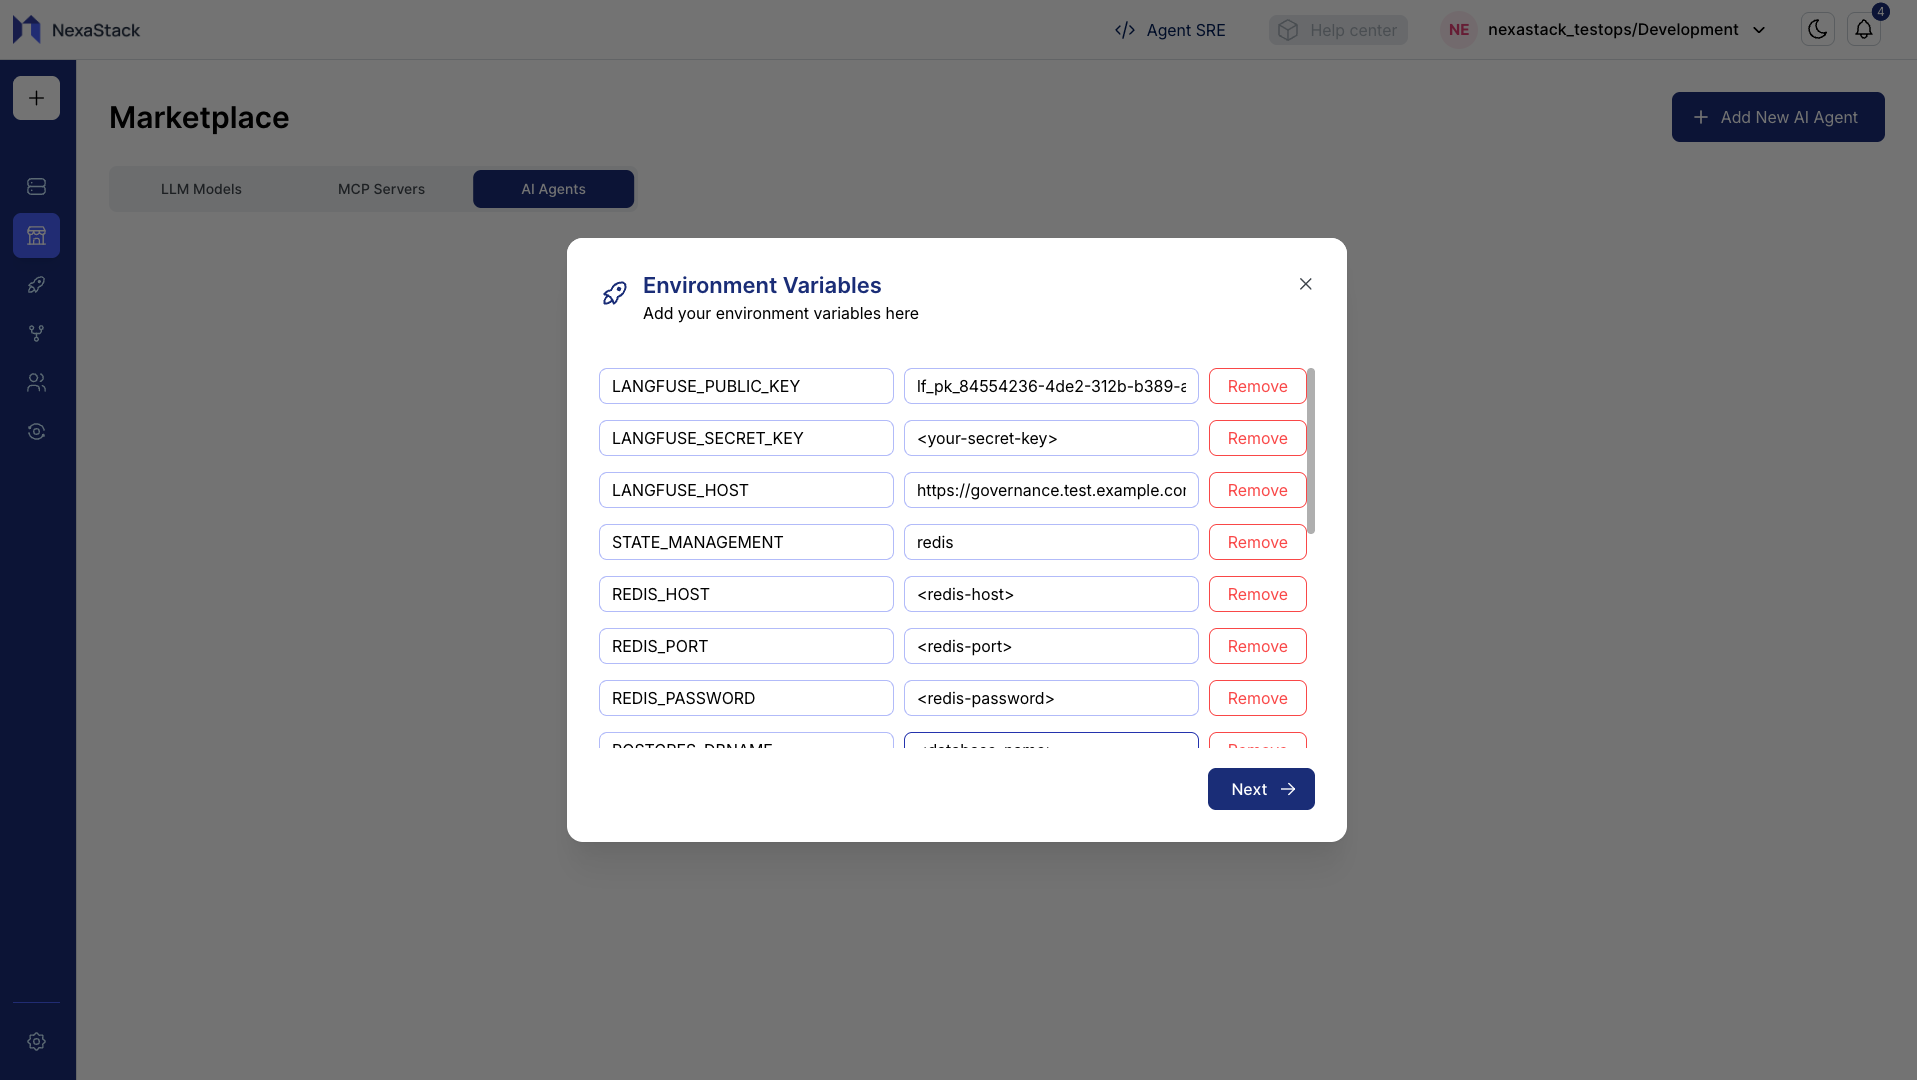
Step 6: Configure Environment Variables
You can now define environment variables required for your AI Agent deployment.
These variables allow the agent to connect to databases, APIs, and internal services securely.
| Key | Value |
|---|---|
| DATABASE_URL | postgres://username:password@host:port/database |
| REDIS_HOST | 127.0.0.1 |
| REDIS_PORT | 6379 |
| API_KEY | your_api_key_here |
Adding Variables
- Click Add Variable to create a new key-value pair.
- Continue adding variables until all required configurations are completed.
- Review each variable for accuracy before proceeding.
Step 7: Define Resource Requirements
Allocate the necessary system resources for your AI Agent to ensure smooth operation.
- The Resource Requirements page will appear.
- Enter CPU and Memory Requests (minimum resources needed for the agent to start):
| Resource | Example Value | Unit |
|---|---|---|
| CPU | 10 | millicores (m) or cores |
| Memory | 128 | Mi or Gi |
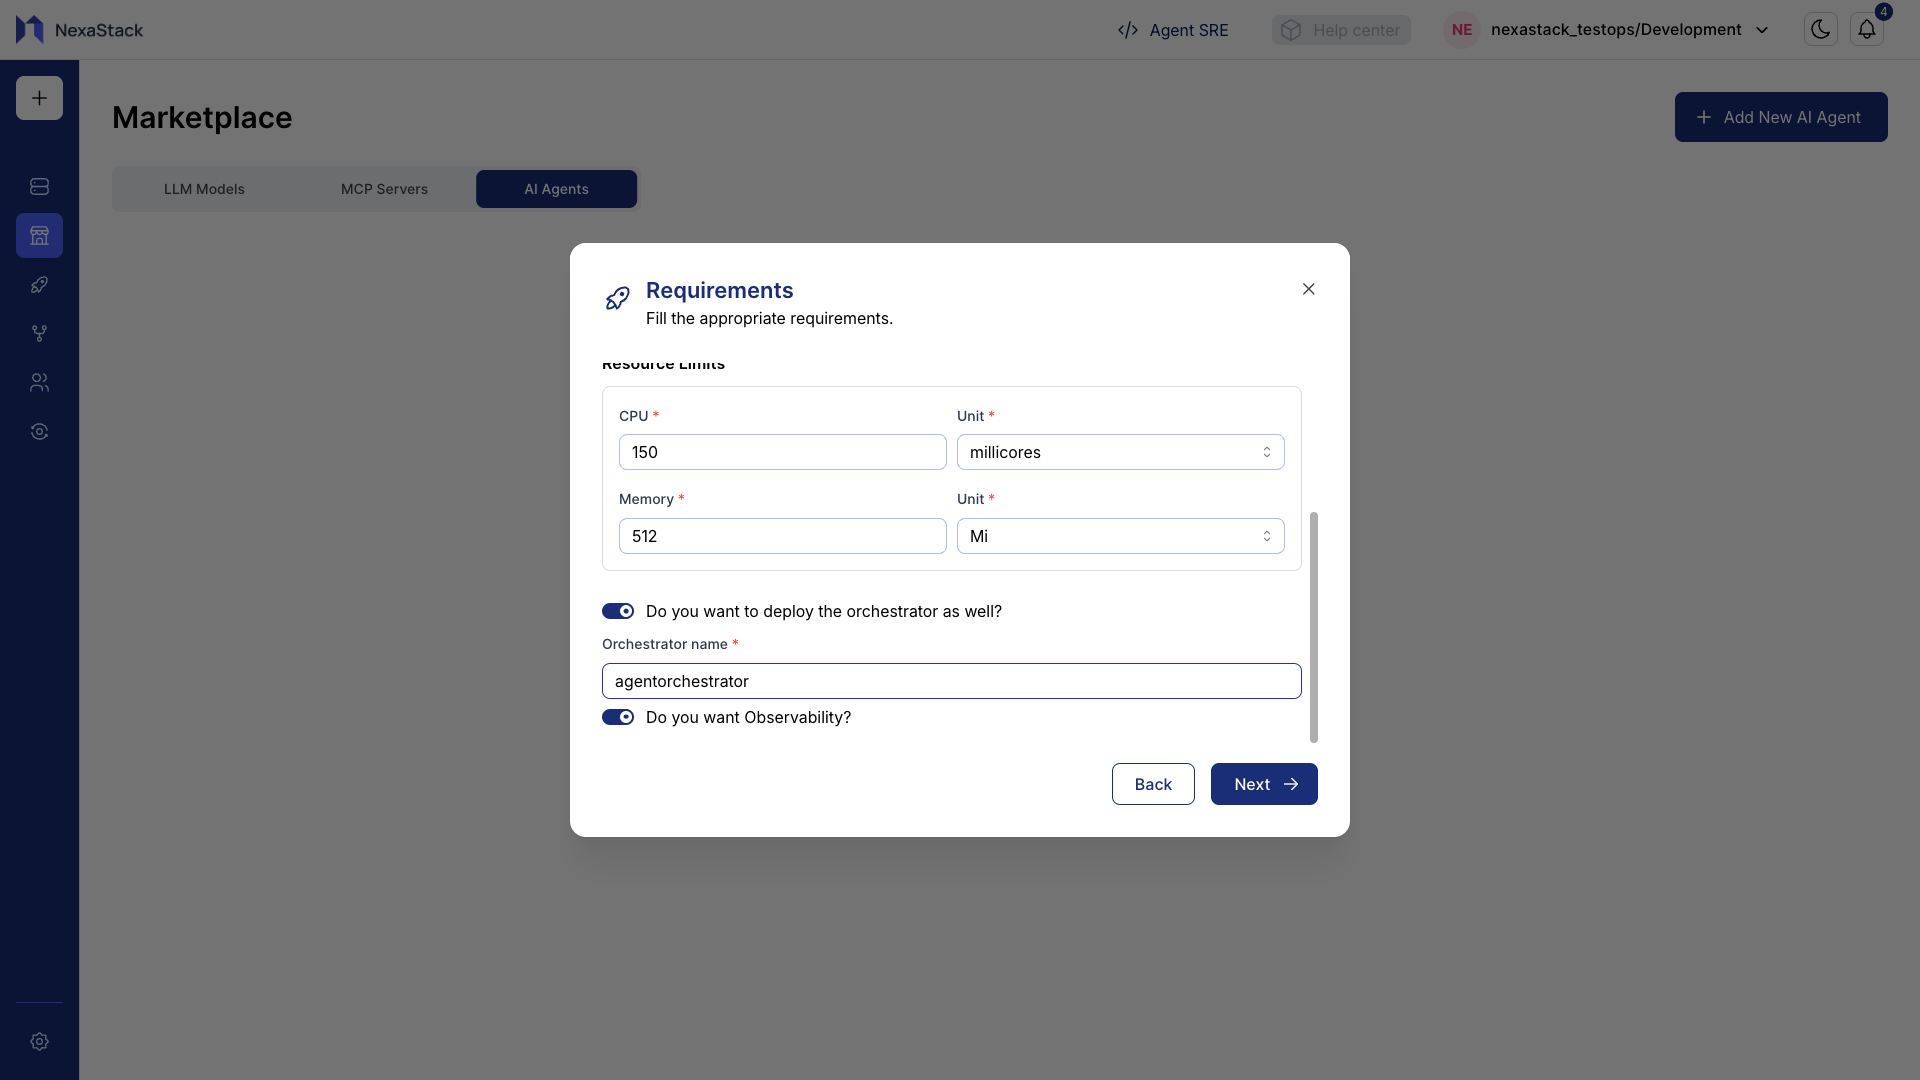
- Enter CPU and Memory Limits (maximum resources allowed to handle spikes):
| Resource | Example Value | Unit |
|---|---|---|
| CPU | 150 | millicores (m) or cores |
| Memory | 512 | Mi or Gi |
- Verify all input fields are filled correctly.
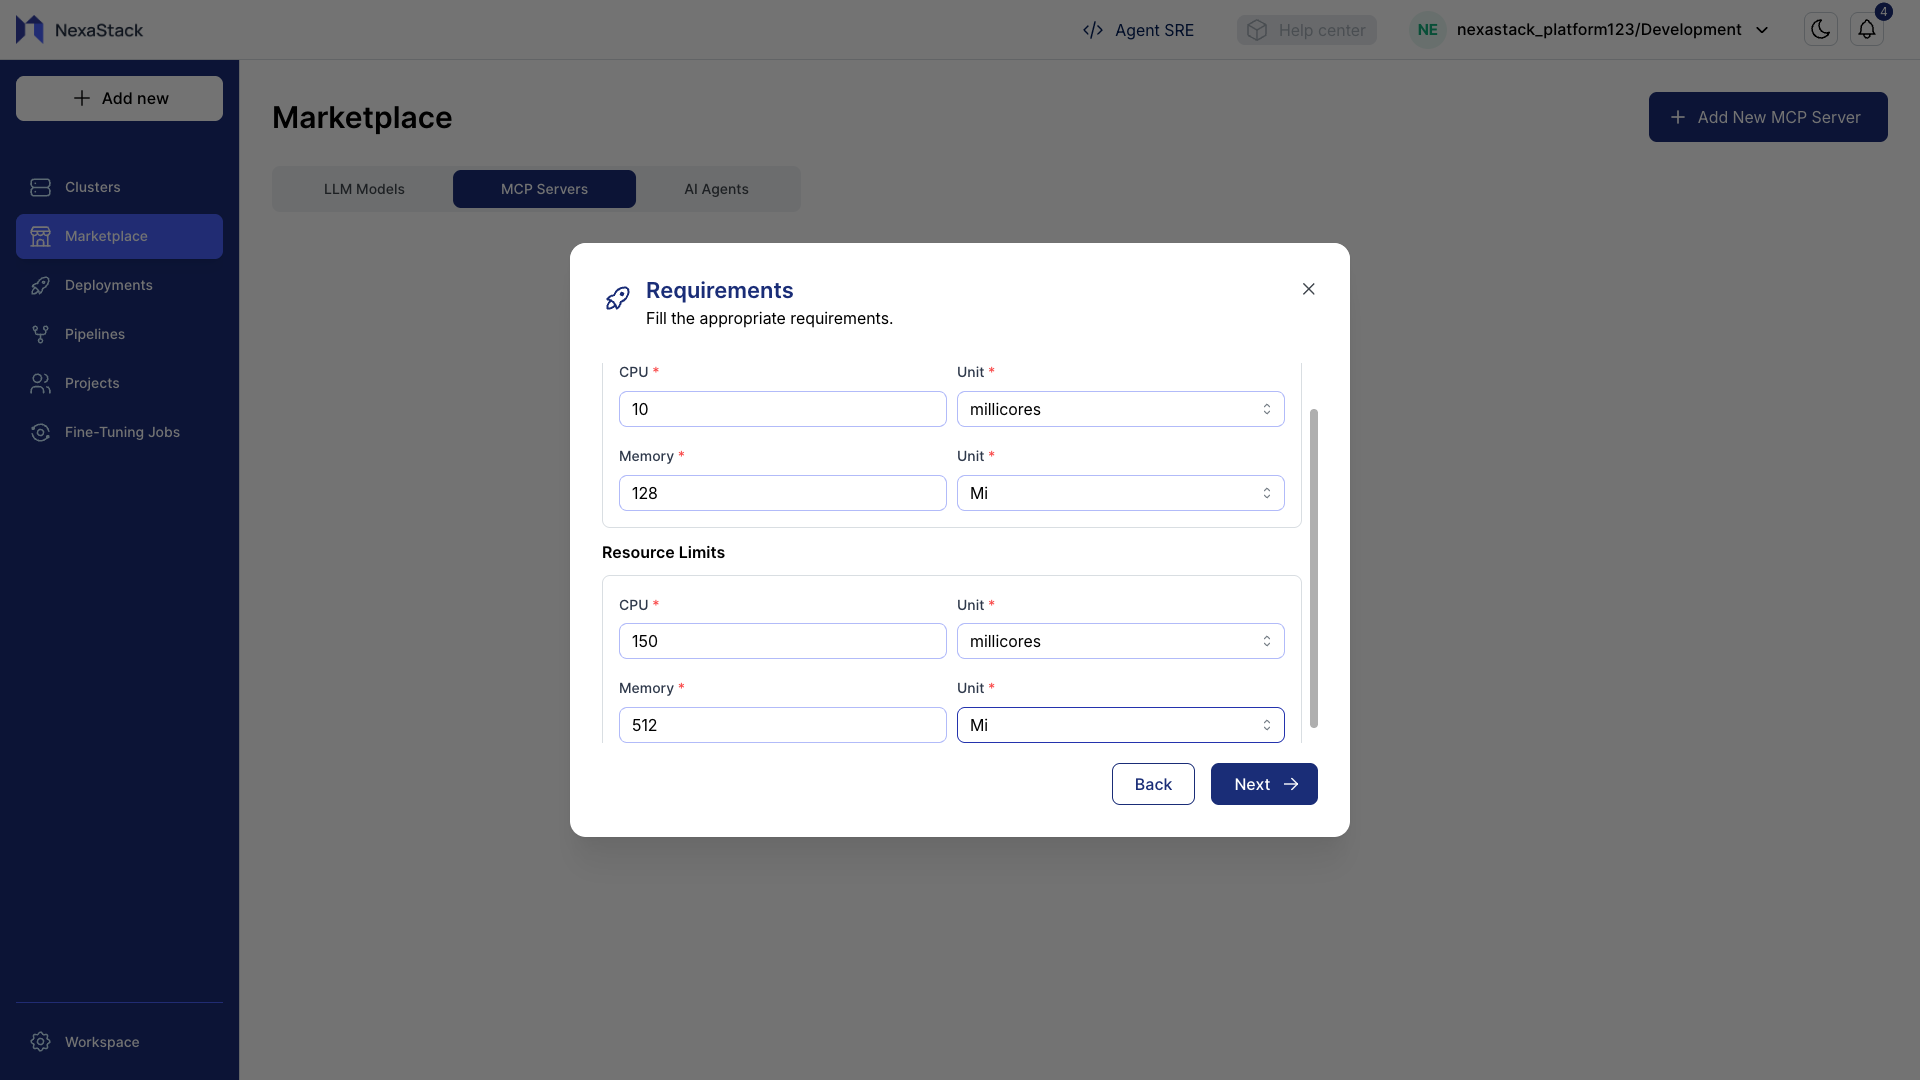
- Requests: Minimum resources needed for the agent to start reliably.
- Limits: Slightly higher values to handle temporary load spikes without throttling.
- Plan based on expected workload to optimize performance and cost.
Optional Deployment Features
-
Orchestrator Deployment
If you want to deploy an orchestrator alongside the agent, enable this toggle and provide a name.Naming ConventionUse lowercase letters with no spaces (e.g.,
agentorchestrator). -
Observability / Tracing
Enable this toggle if you want to monitor traces and metrics for the agent during runtime.
Step 8: Select Cluster
- From the dropdown, select your preferred Cluster where the AI Agent will run.
- This determines how and where the agent gets deployed and managed.
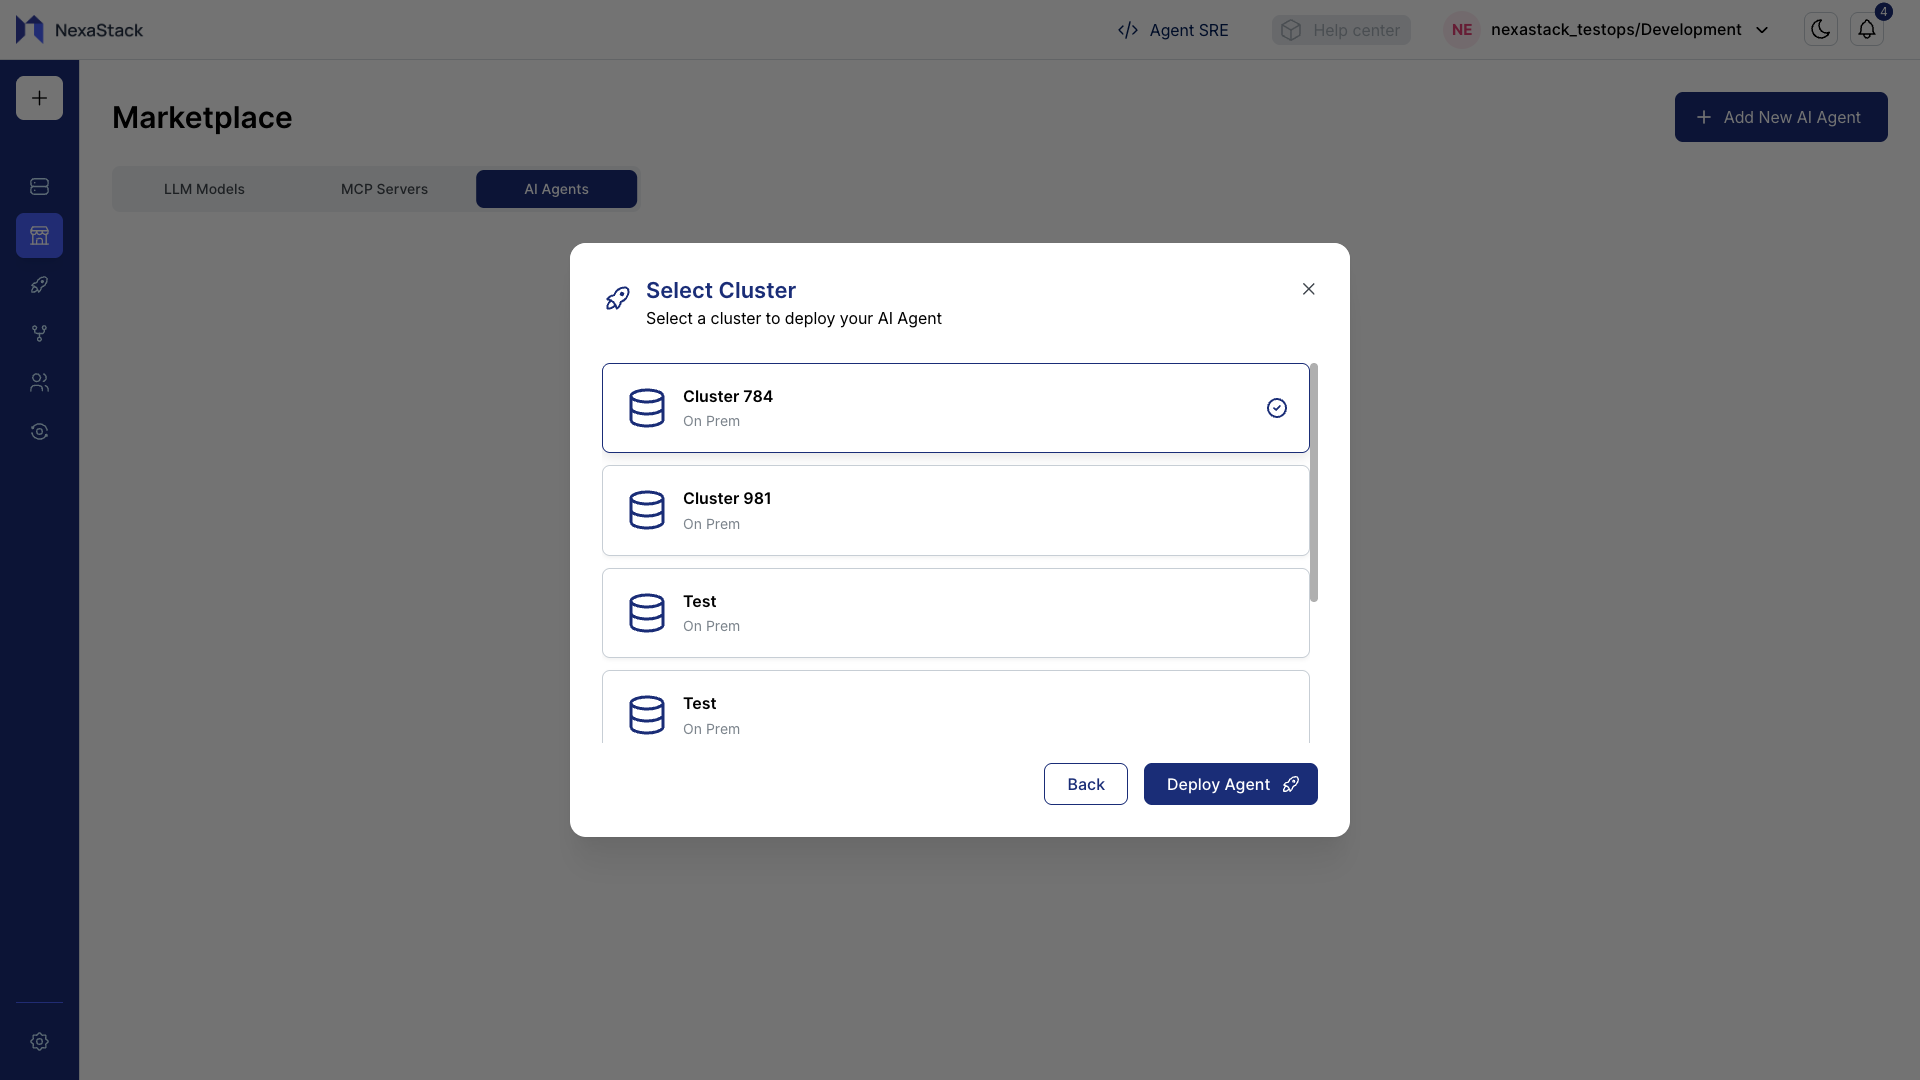
If you don’t have an available cluster, onboard one based on your workspace preferences.
👉 Onboard a Cluster
Click Deploy Agent to start deployment.
Step 9: Monitor Pipeline Status
After clicking Deploy Agent, NexaStack will initiate the deployment pipeline.
You can monitor real-time status updates:
| Status | Description |
|---|---|
| Pending | Deployment has been triggered and is waiting for resources. |
| Running | The agent is currently being deployed. |
| Success | Deployment completed successfully. |
| Failed | Deployment failed — check pipeline logs for errors. |
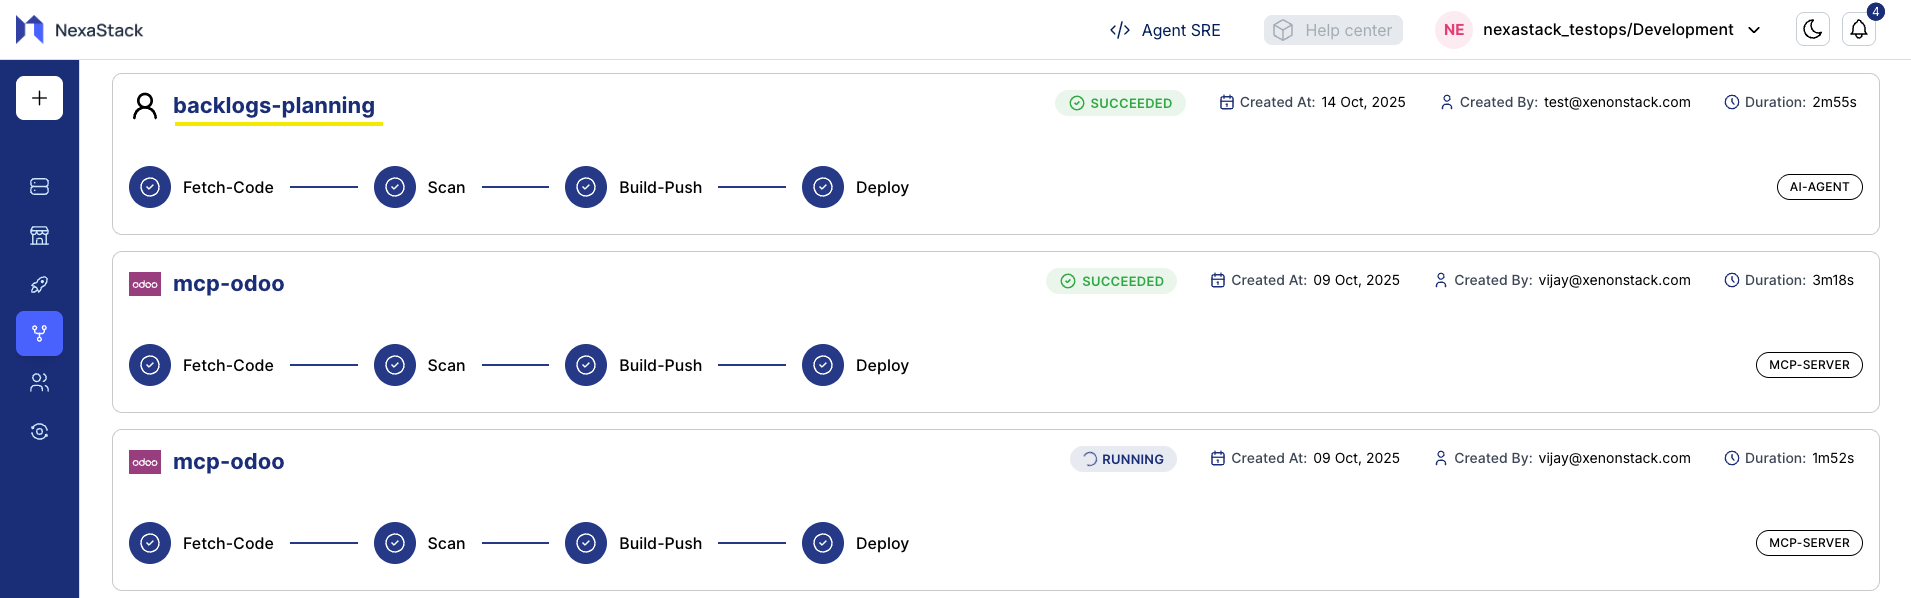
Use the Pipeline Logs view to track detailed progress.
If a deployment fails, logs help identify issues like misconfiguration or missing dependencies.
Completion Message
You have successfully deployed an AI Agent in NexaStack.
Your deployment is now active and ready for production or further integration.
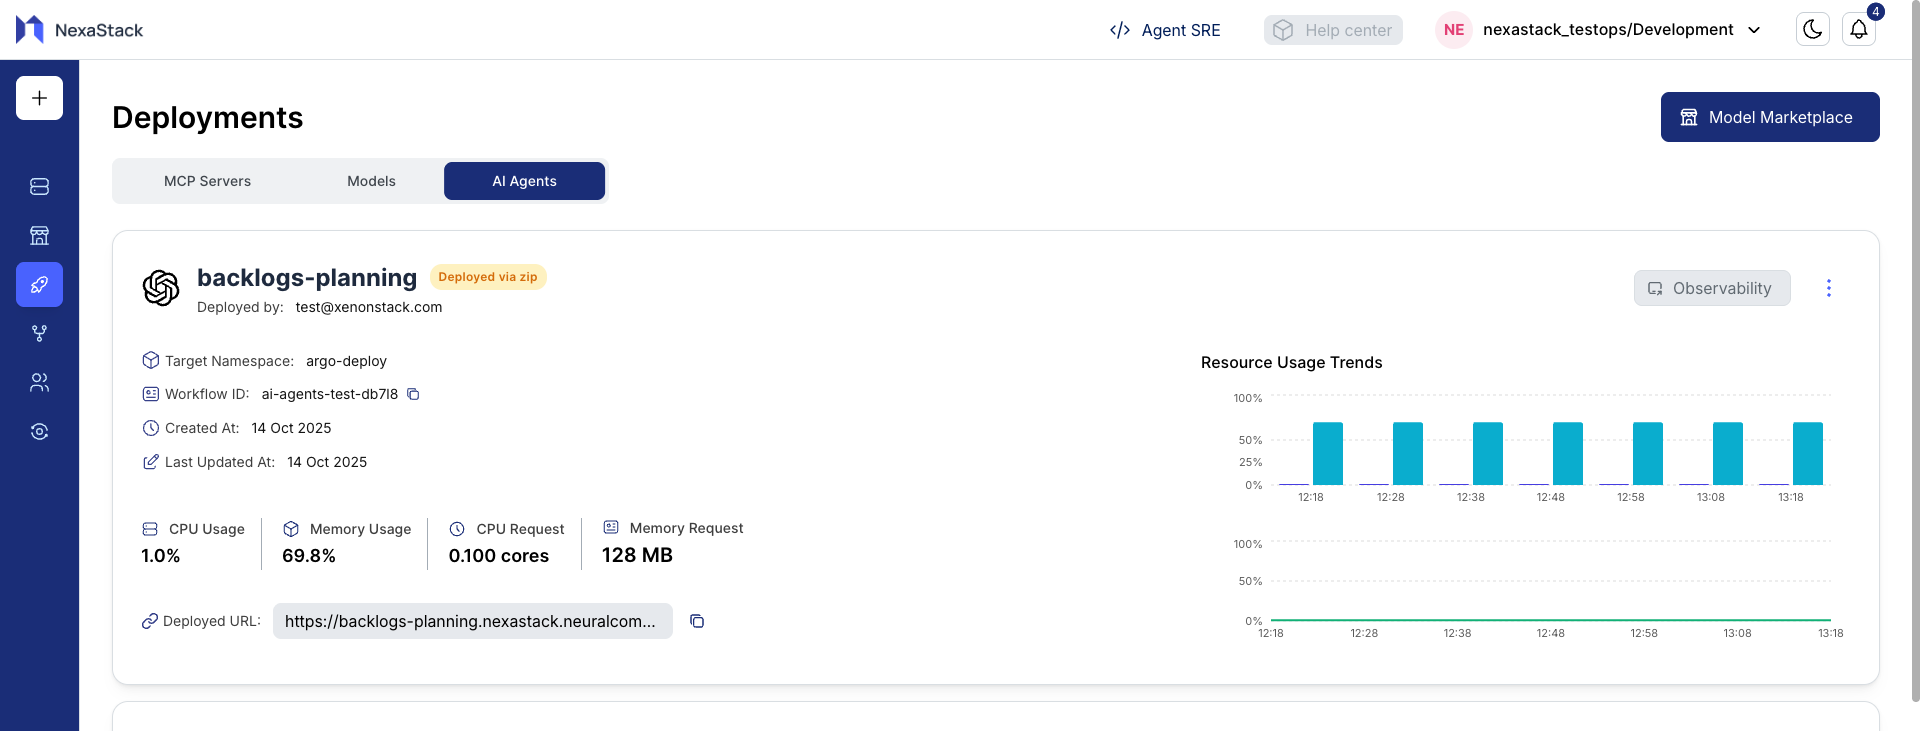
Post-Deployment Steps
Once Pipeline completes successfully:
- Access your deployed AI Agent from the Dashboard.
- Copy the Deployed URL or endpoint provided.
- Test agent responses or integrations.
- Monitor CPU, memory, and inference metrics from the Observability Dashboard.
Best Practices
- Validate your package or repository before deploying.
- Allocate appropriate resources to prevent downtime.
- Use secure tokens and avoid hardcoded credentials.
- Monitor deployments regularly to ensure uptime and performance.
- Test inference endpoints before moving to production.