Fine-Tuning Job Creation Workflow
This guide provides a step-by-step walkthrough for creating a fine-tuning job on Nexastack. Following these steps ensures your fine-tuning job is configured correctly and submitted successfully.
Goal
Learn how to:
- Create a new fine-tuning job for a selected base model.
- Upload training datasets and configure parameters.
- Review and submit jobs while verifying successful creation.
Step 1: Login to the Platform
- Open the NexaStack login page.
- Login with correct credientials
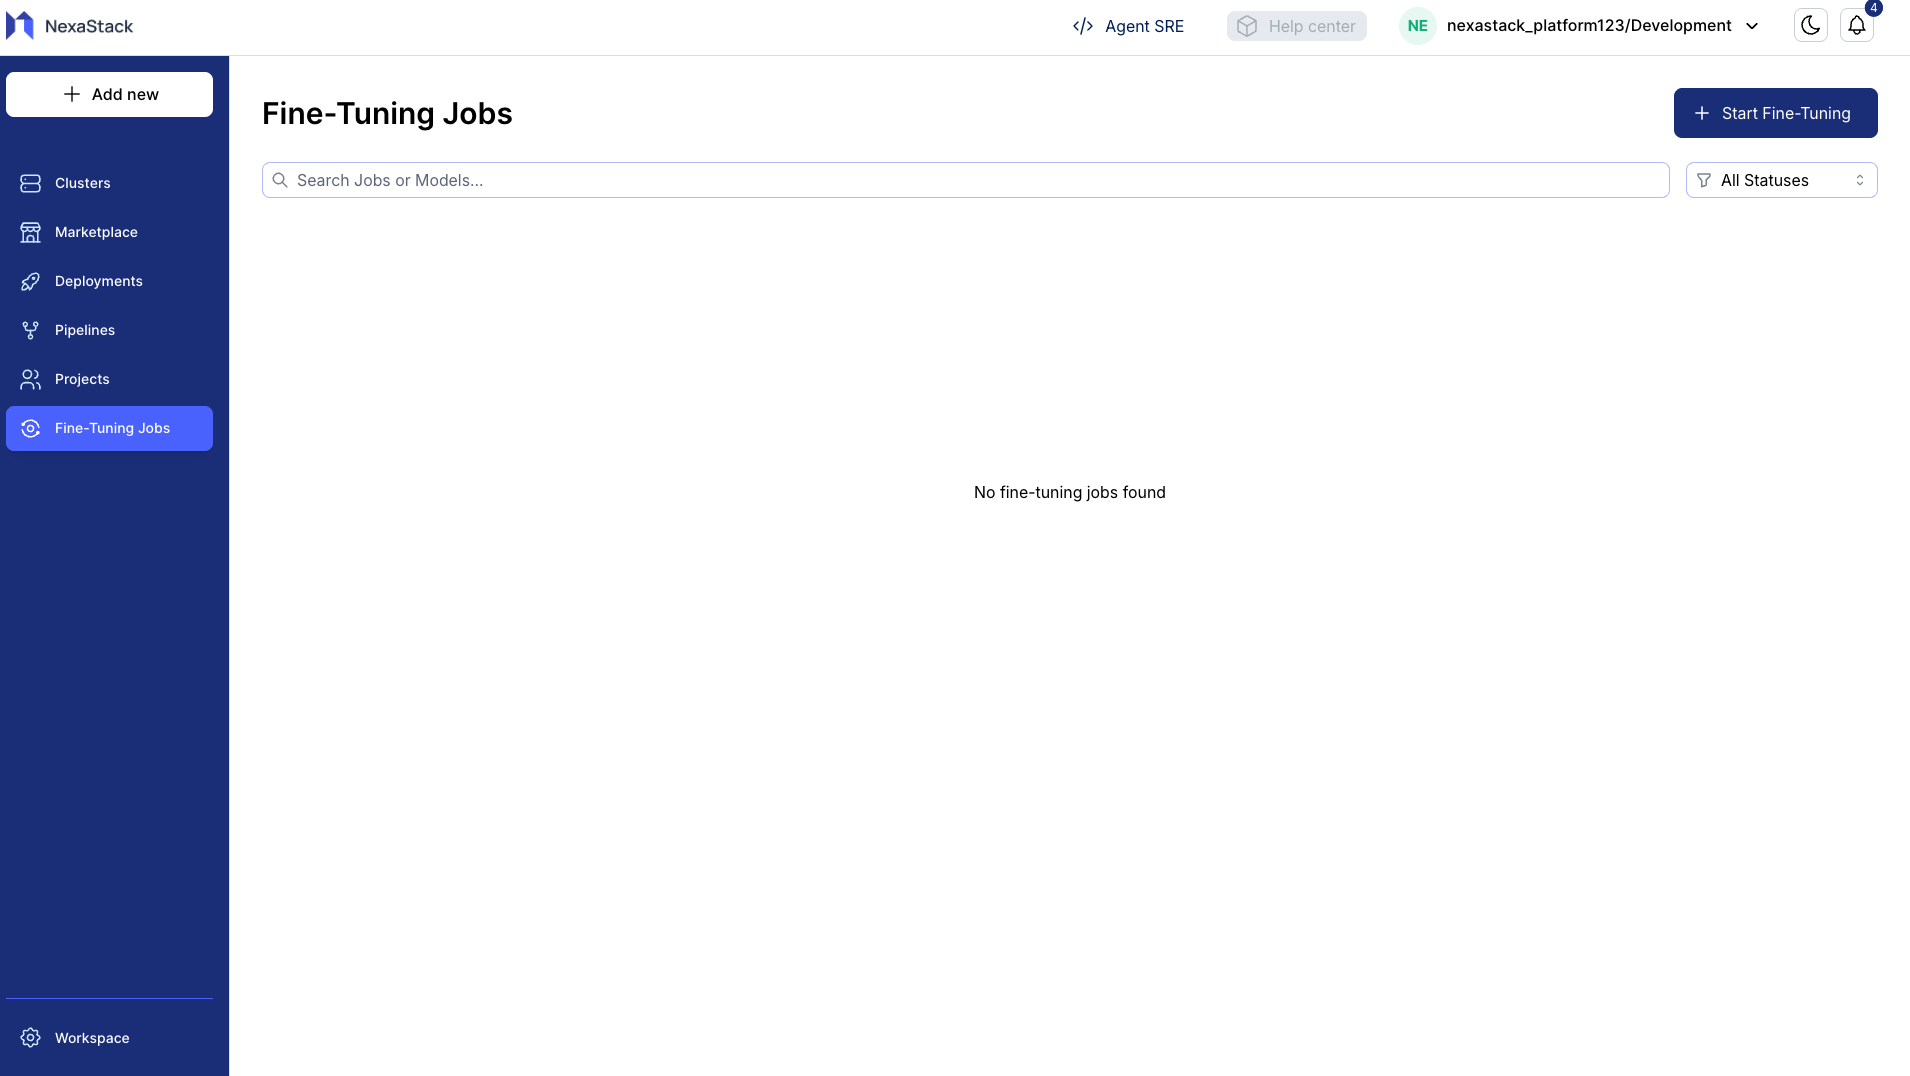
Step 2: Access Fine-Tuning Section
- Navigate to the Marketplace or Fine-Tuning jobs from the sidebar.
- Open the Fine-Tune Model section.
- Click Create New Fine-Tuning Job.
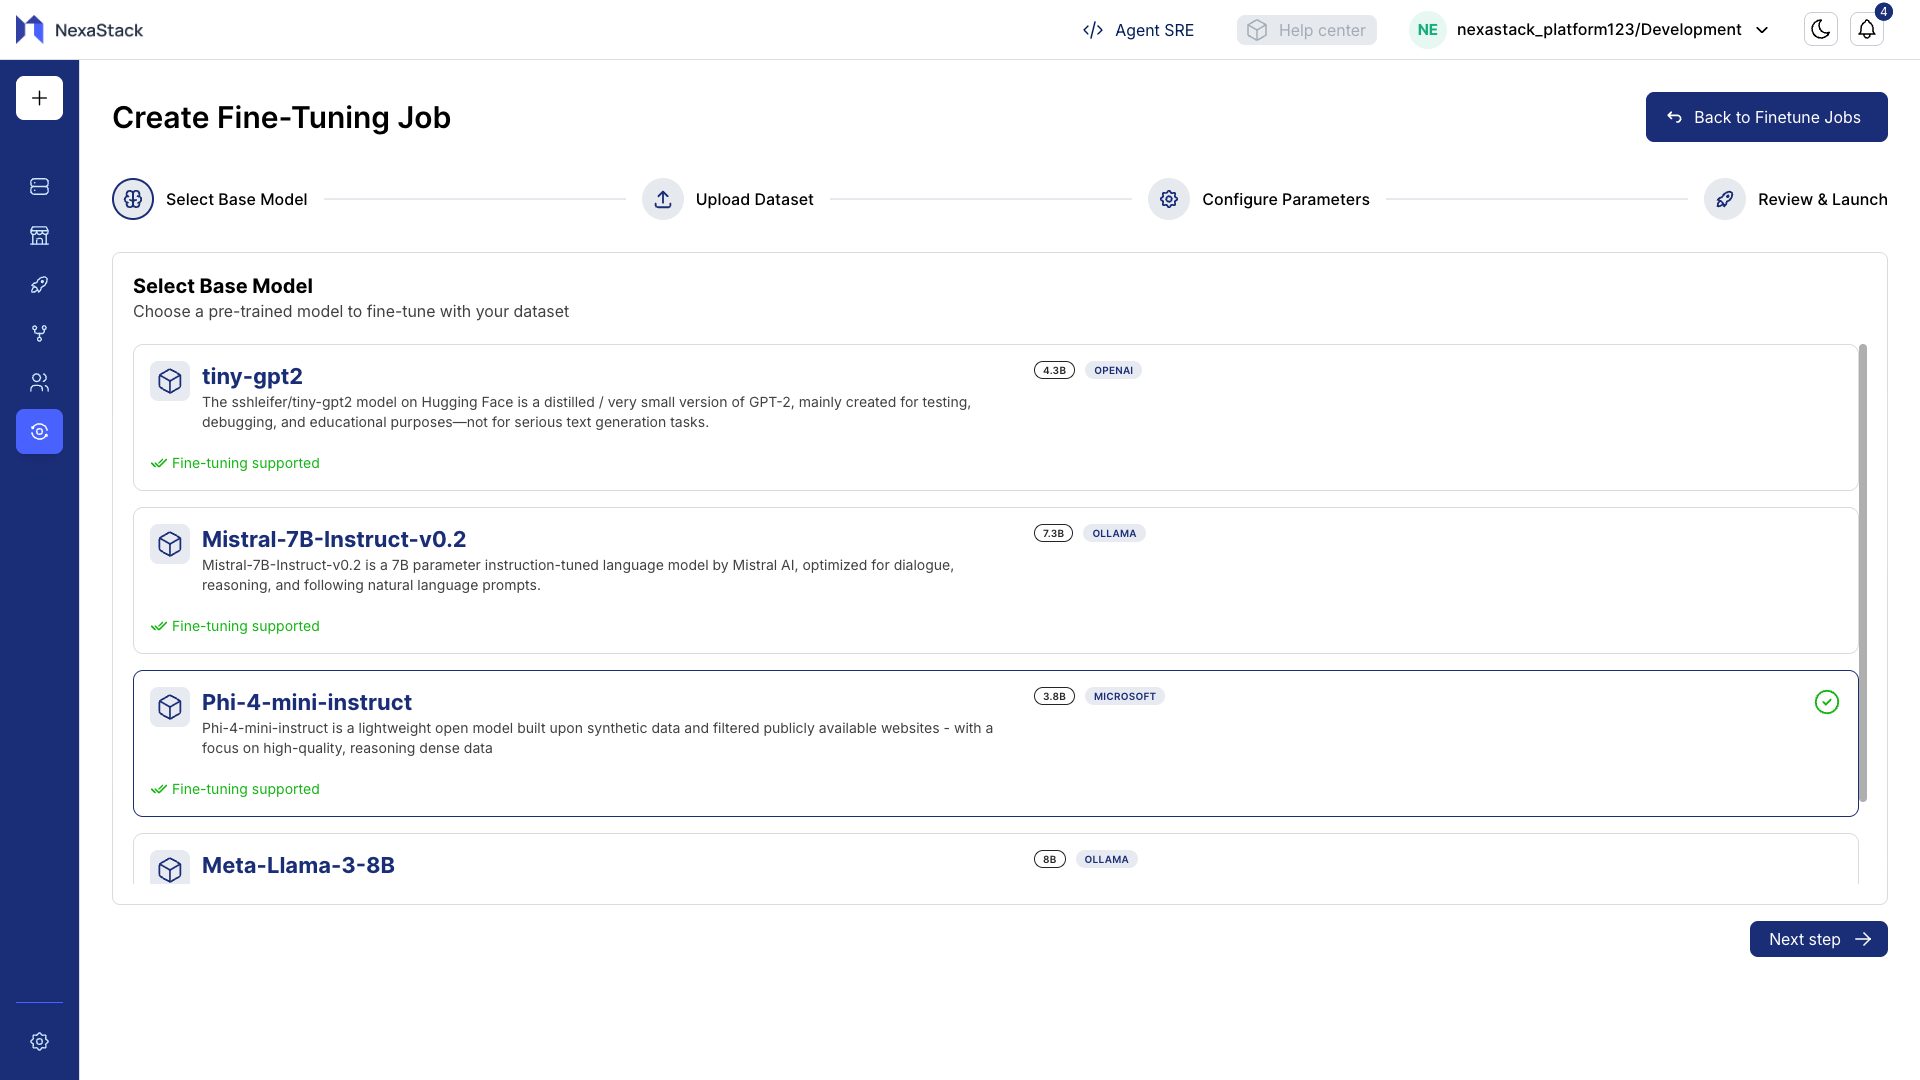
Step 3: Select Base Model
- Choose the base model you want to fine-tune.
- Review the model details, capabilities, and limitations.
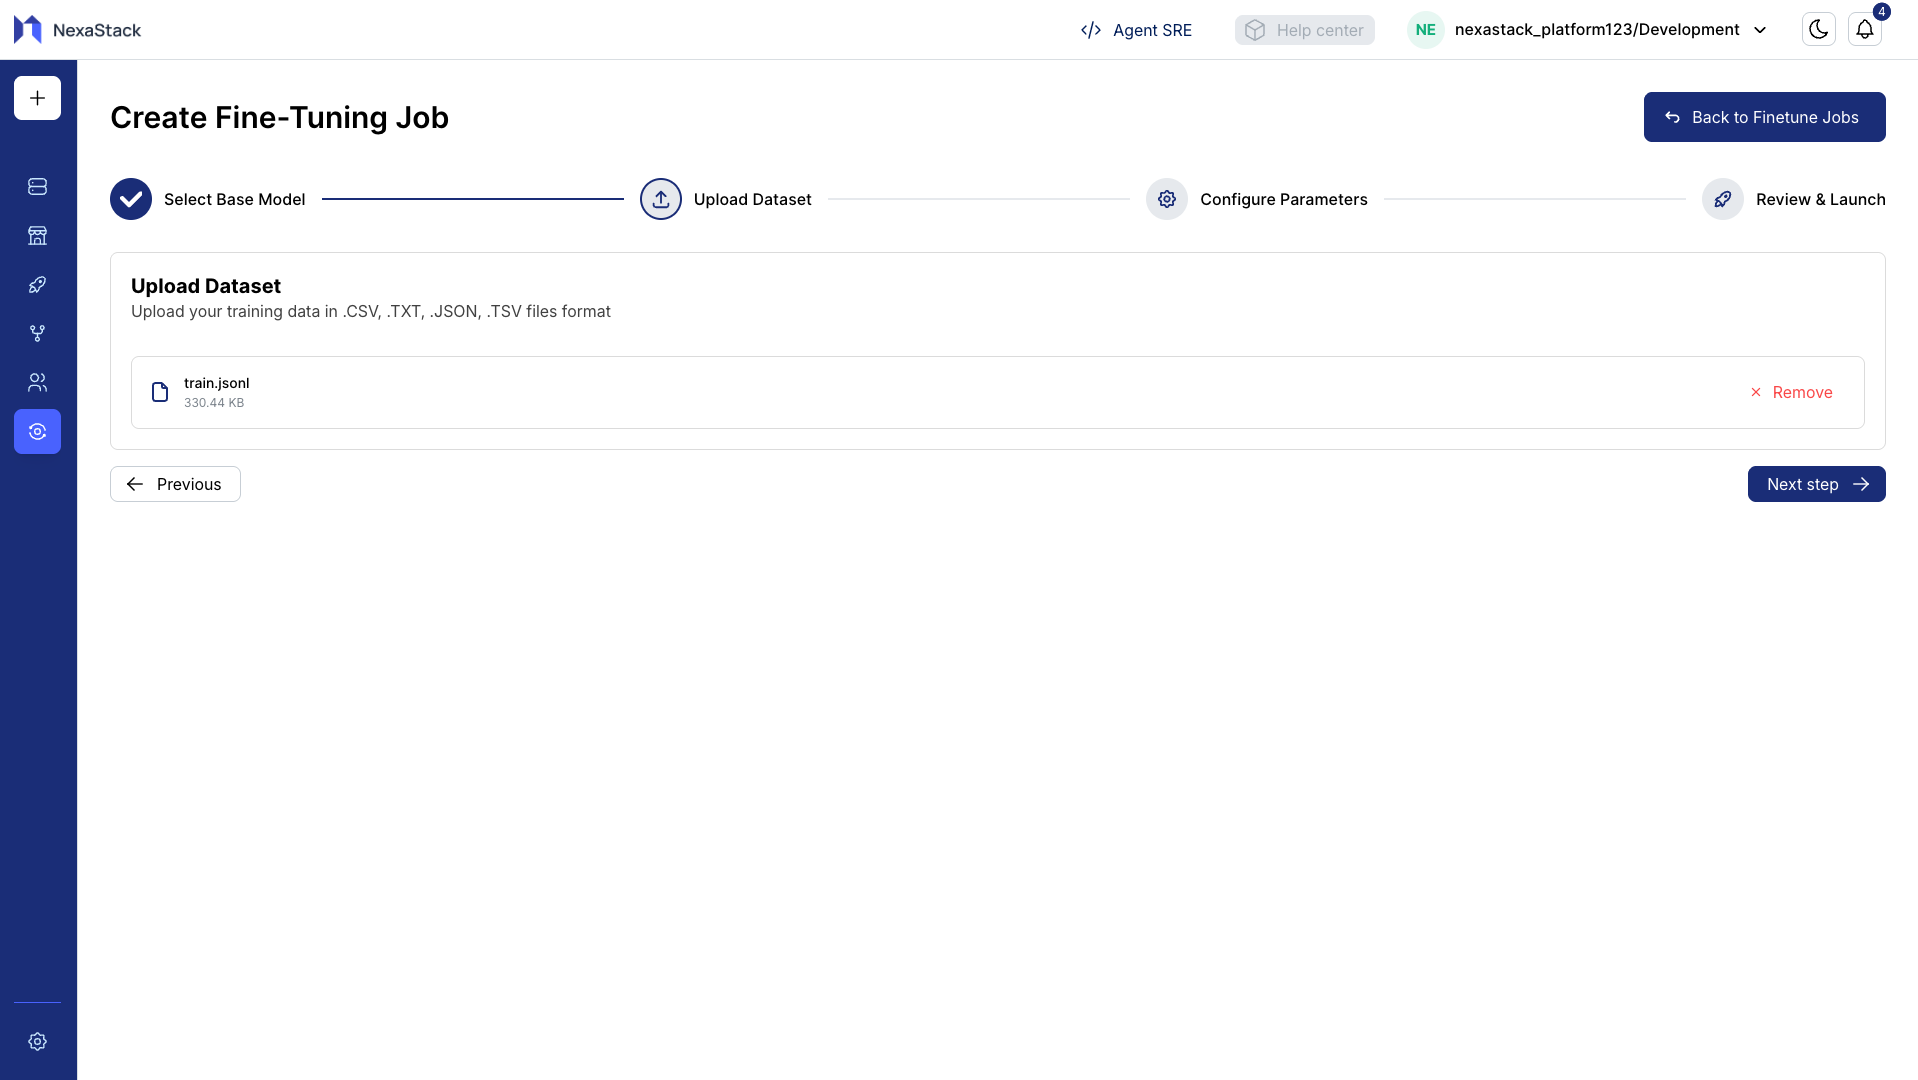
Step 4: Upload Training Dataset
- Click Upload Training File.
- Select the dataset file from your local system.
- Confirm successful upload — a confirmation message or file preview should appear.
Dataset Requirements
- Ensure the dataset is in a supported format (e.g., JSON, CSV).
- Validate that the dataset contains the necessary fields for training.
- Large files may take longer to upload.
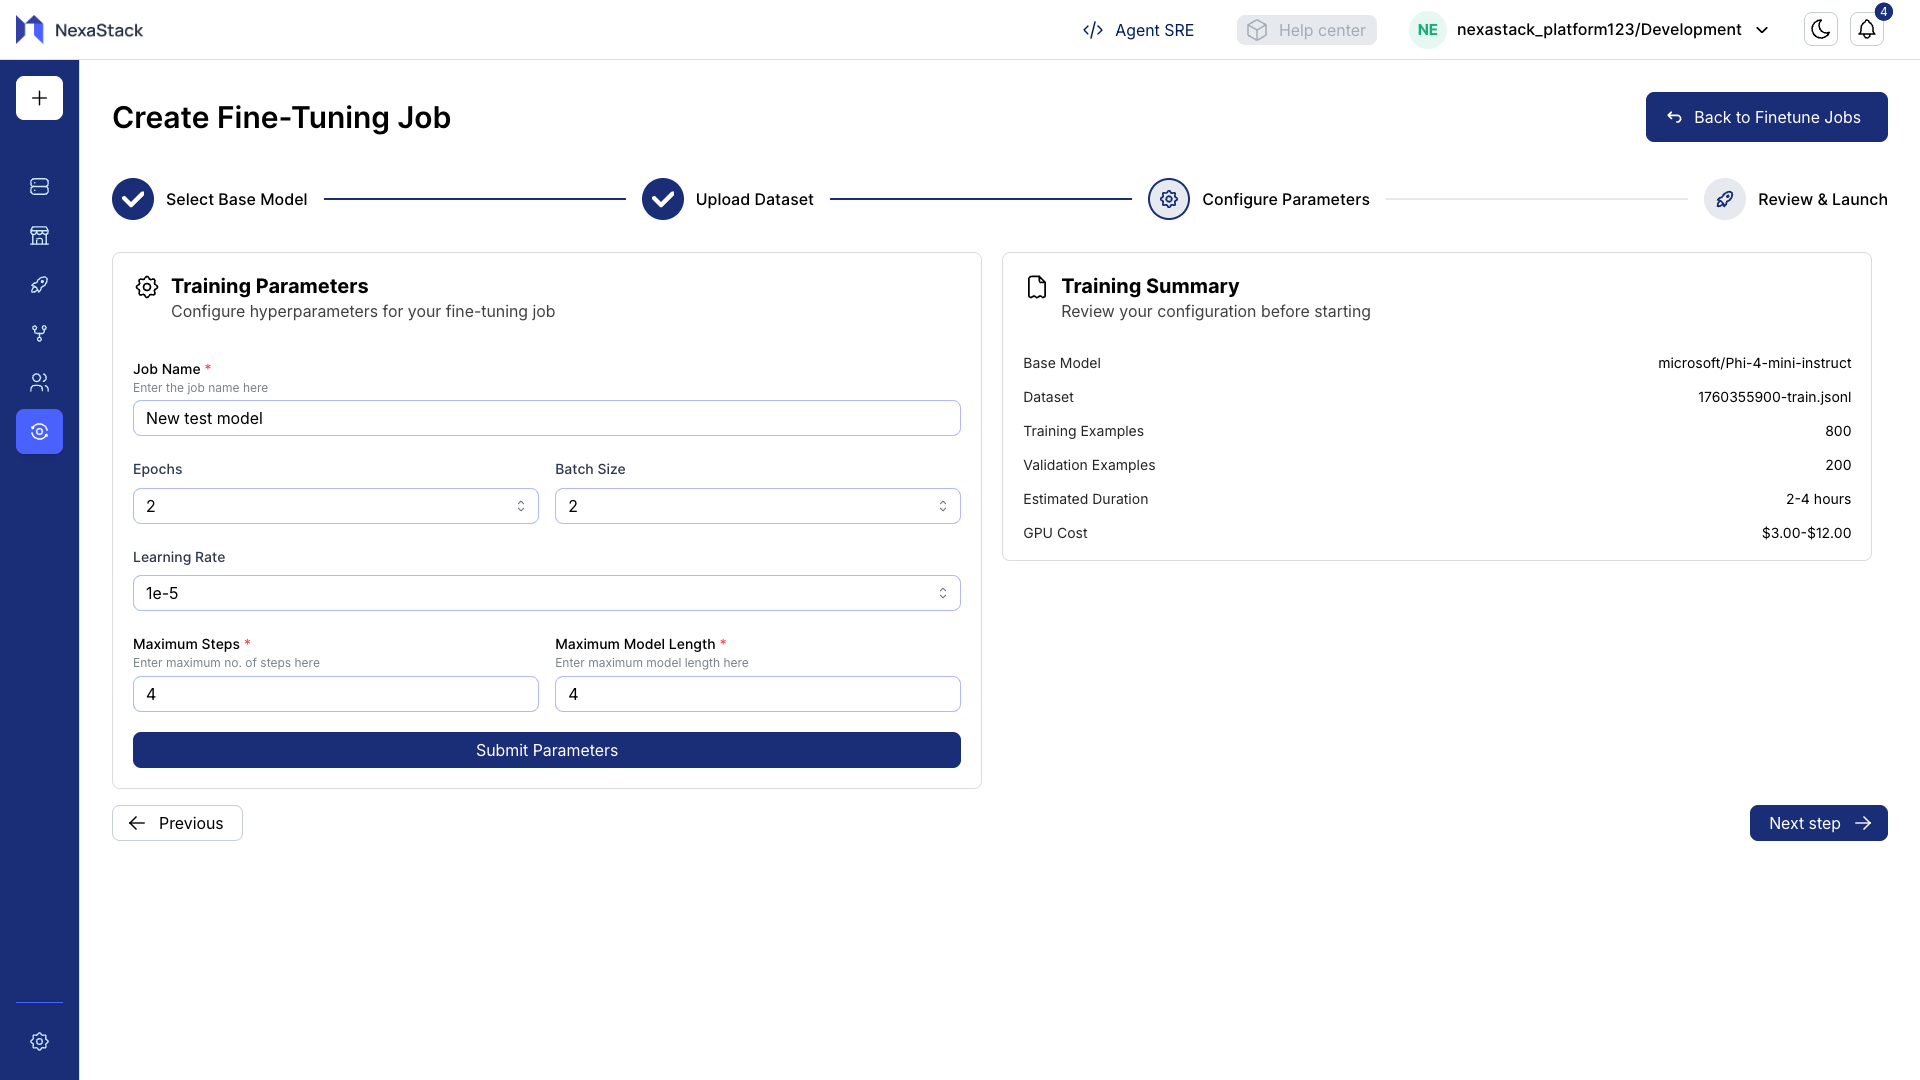
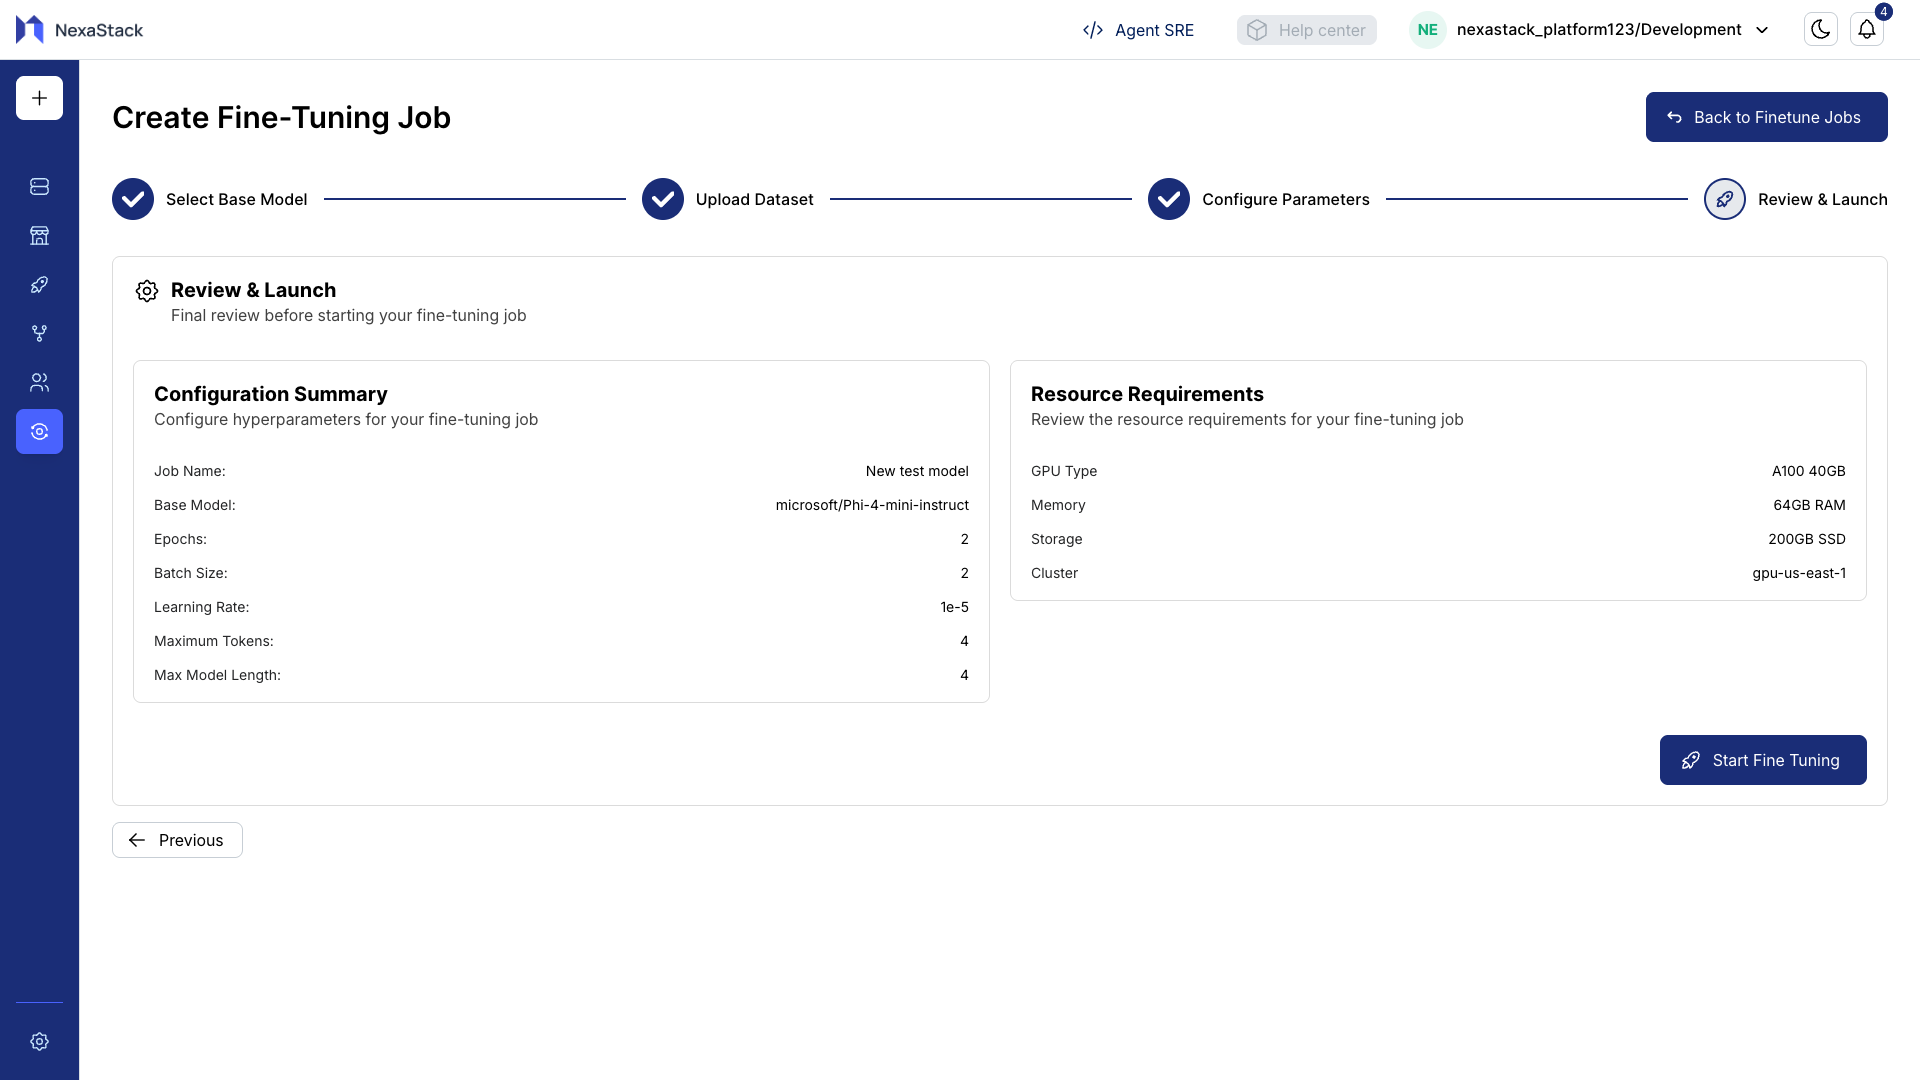
Step 5: Set Training Parameters
- Enter a Job Name for identification.
- Configure the training parameters:
| Parameter | Description | Example |
|---|---|---|
| Epochs | Number of passes over the dataset | 3–5 |
| Batch Size | Number of samples per training batch | 8–32 |
| Learning Rate | Step size for optimization | 5e-5–1e-4 |
| Max Steps | Maximum number of training steps | Nearby 10 |
| Model Length | Maximum token length per sample | Nearby 10 |
- Validate all required fields are completed.
Step 6: Review and Submit
- Review the training summary including dataset details and configured parameters.
- Click Submit to start the fine-tuning job.
Pro Tip
Double-check all parameters before submitting. Incorrect settings can lead to suboptimal fine-tuning or job failure.
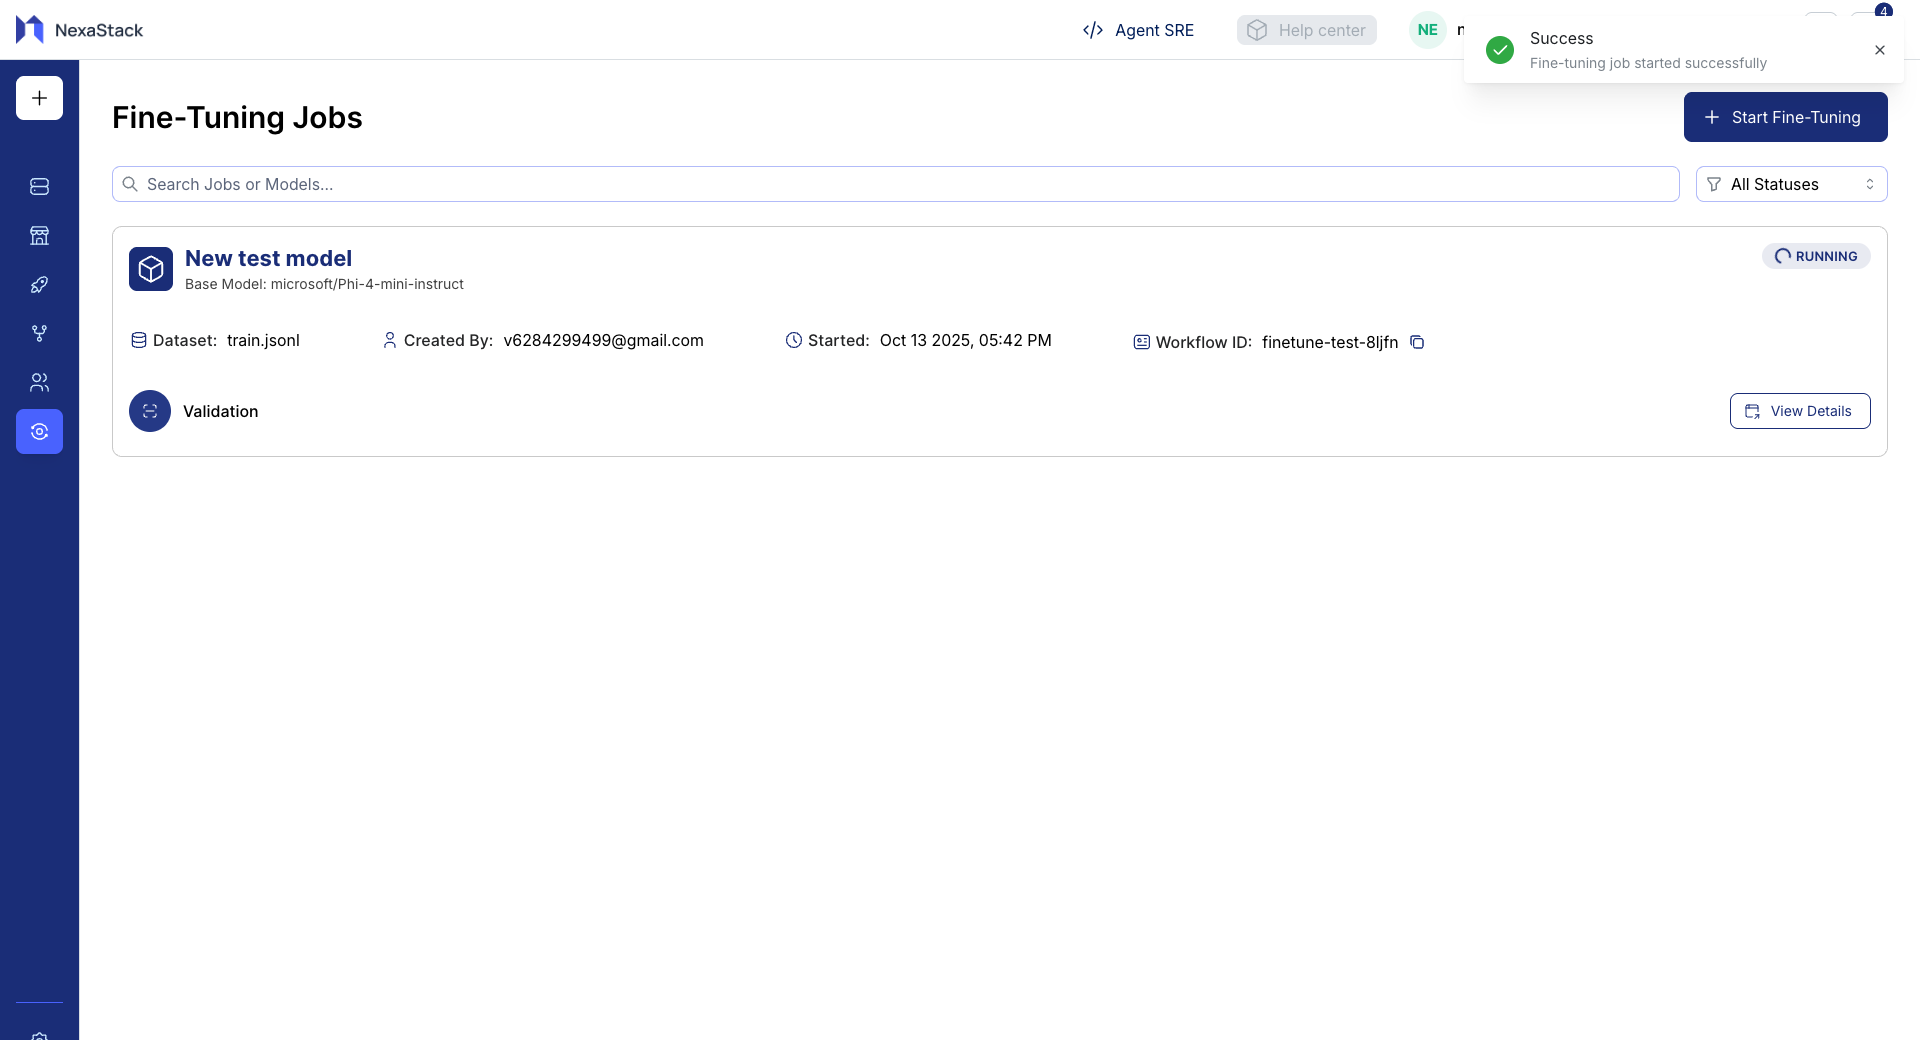
Step 7: Verify Job Creation
- Check the backend/API to ensure the job is created successfully.
- Confirm the new job appears in the list of fine-tuning jobs under the Fine-Tuning section.
- Monitor the job status to track progress Pending → Running → Succeeded/Failed .
Best Practices
- Use descriptive job names for easy identification.
- Test your dataset with a small sample before full-scale training.
- Keep track of parameter combinations and results for reproducibility.
- Monitor system resources during fine-tuning to avoid interruptions.
Fine-Tuning Job Created
You have successfully created a fine-tuning job in Nexastack. The model is now queued for training and will be ready for deployment upon completion.