Nexastack Managed Kubernetes Cluster
This guide provides a step-by-step walkthrough for onboarding a Nexastack-managed Kubernetes cluster.
These clusters are fully managed and maintained by Nexastack, allowing teams to focus entirely on model deployment and monitoring without the overhead of cluster administration.
What is a Nexastack Managed Cluster?
A Nexastack Managed Cluster is a pre-configured and fully managed Kubernetes environment provisioned by Nexastack.
It provides a seamless, ready-to-use infrastructure for deploying AI models, managing workloads, and scaling services automatically — all without manual setup or maintenance.
Key Benefits
- Zero Maintenance: Nexastack handles provisioning, scaling, monitoring, and upgrades.
- Optimized for AI Workloads: Pre-tuned for model serving, inference, and data-intensive operations.
- Integrated Monitoring: Prometheus and Grafana are pre-integrated for performance tracking.
- High Availability: Managed clusters are configured with built-in redundancy and fault tolerance.
- Seamless Integration: Works natively with Nexastack’s AI deployment and monitoring tools.
When to Choose a Managed Cluster
Use a Nexastack-managed cluster when you want:
- Minimal DevOps involvement — No need to manage Kubernetes manually.
- Guaranteed compatibility with Nexastack’s deployment engine.
- Simplified onboarding for teams focused on AI and ML workloads.
- Centralized management and enterprise-grade support.
If your organization prefers full control or has custom infrastructure requirements, you can instead onboard an On-Premises Cluster.
Onboarding a Managed Cluster
Follow these simple steps to onboard a Nexastack Managed Kubernetes Cluster.
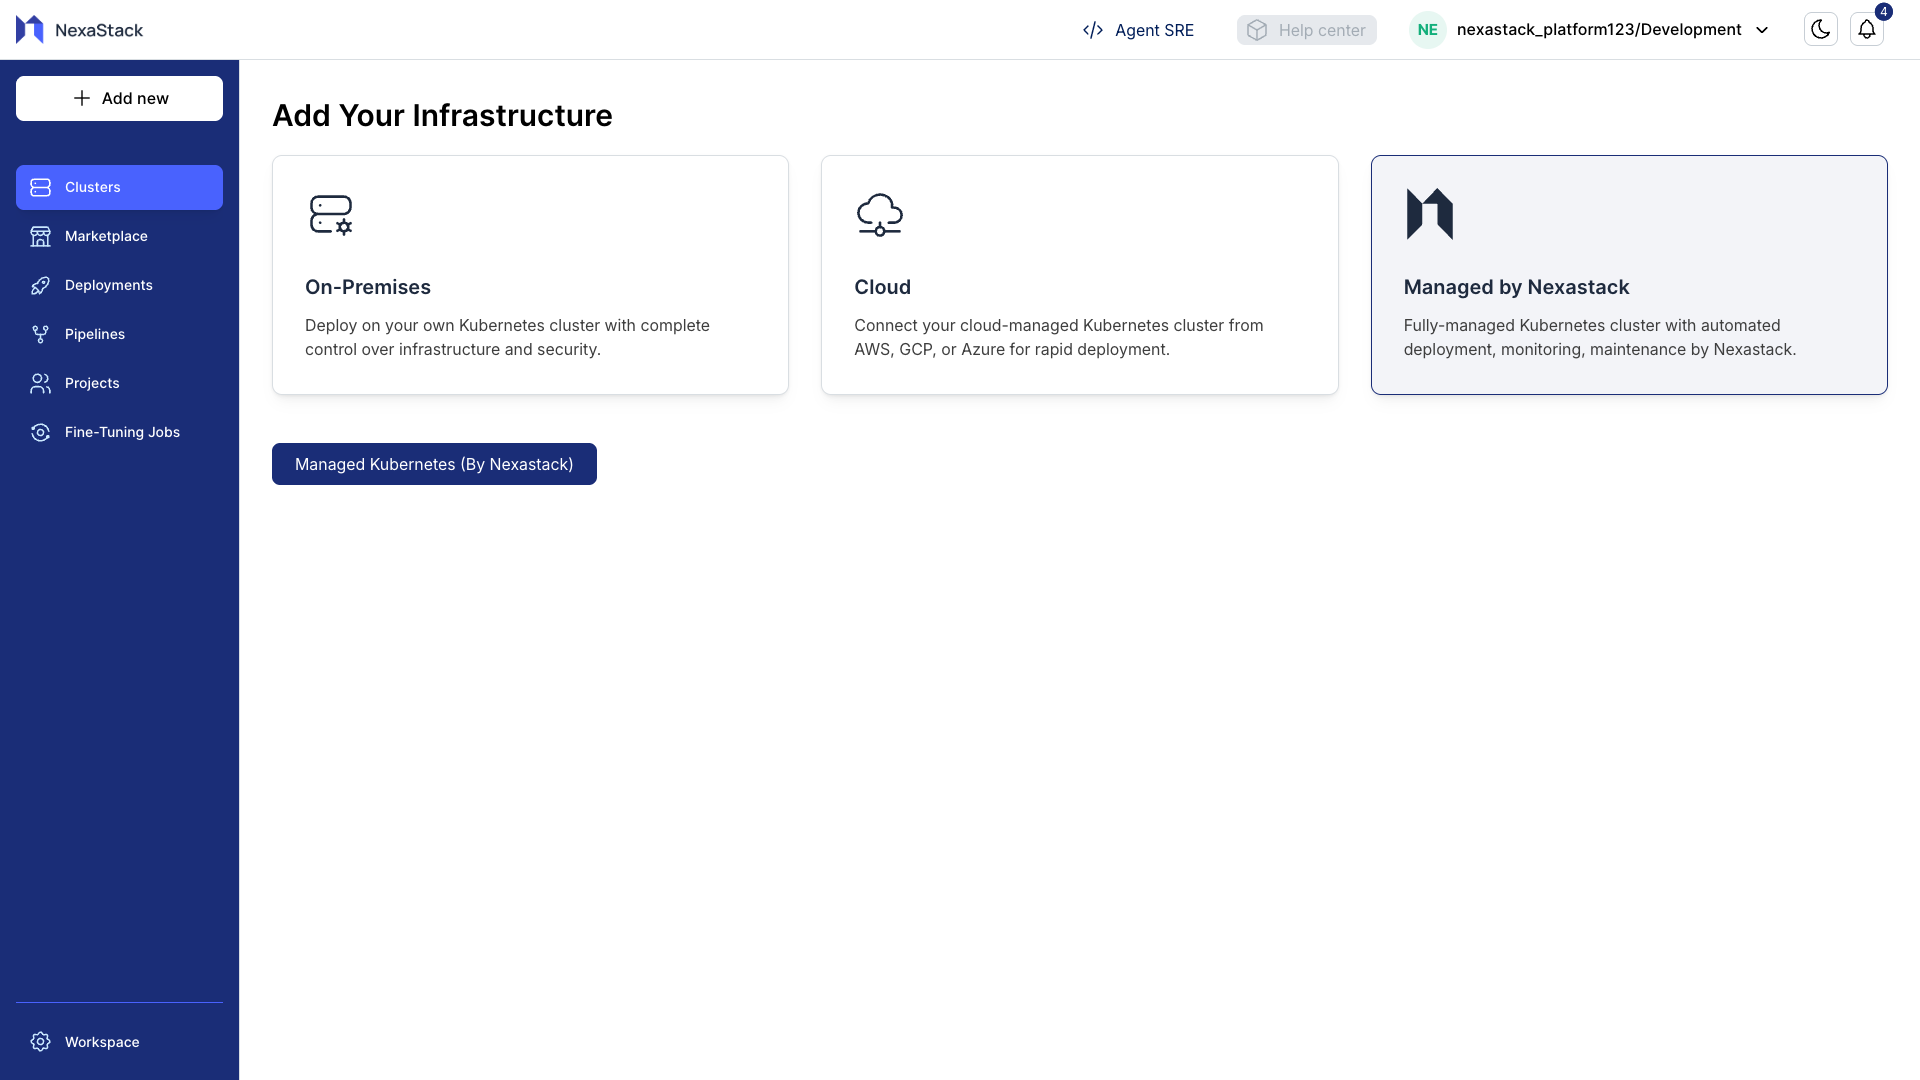
Step 1: Navigate to Managed Clusters
- From the Nexastack dashboard, go to the Clusters section.
- Select the Managed by Nexastack tab.
Step 2: Select Managed Kubernetes
- Click Managed Kubernetes (By Nexastack).
- A configuration popup will appear.
Step 3: Enter Cluster Details
In the popup dialog:
- Enter the Cluster Name — for example,
Demo ClusterorAI-Prod-Managed. - Review your input and ensure the cluster name follows your team’s naming conventions.
- Click Submit to initiate the onboarding process.

- Use clear, descriptive names for easier tracking (e.g.,
teamX-managed-clusterorvision-ai-prod). - Avoid using special characters or spaces in cluster names.
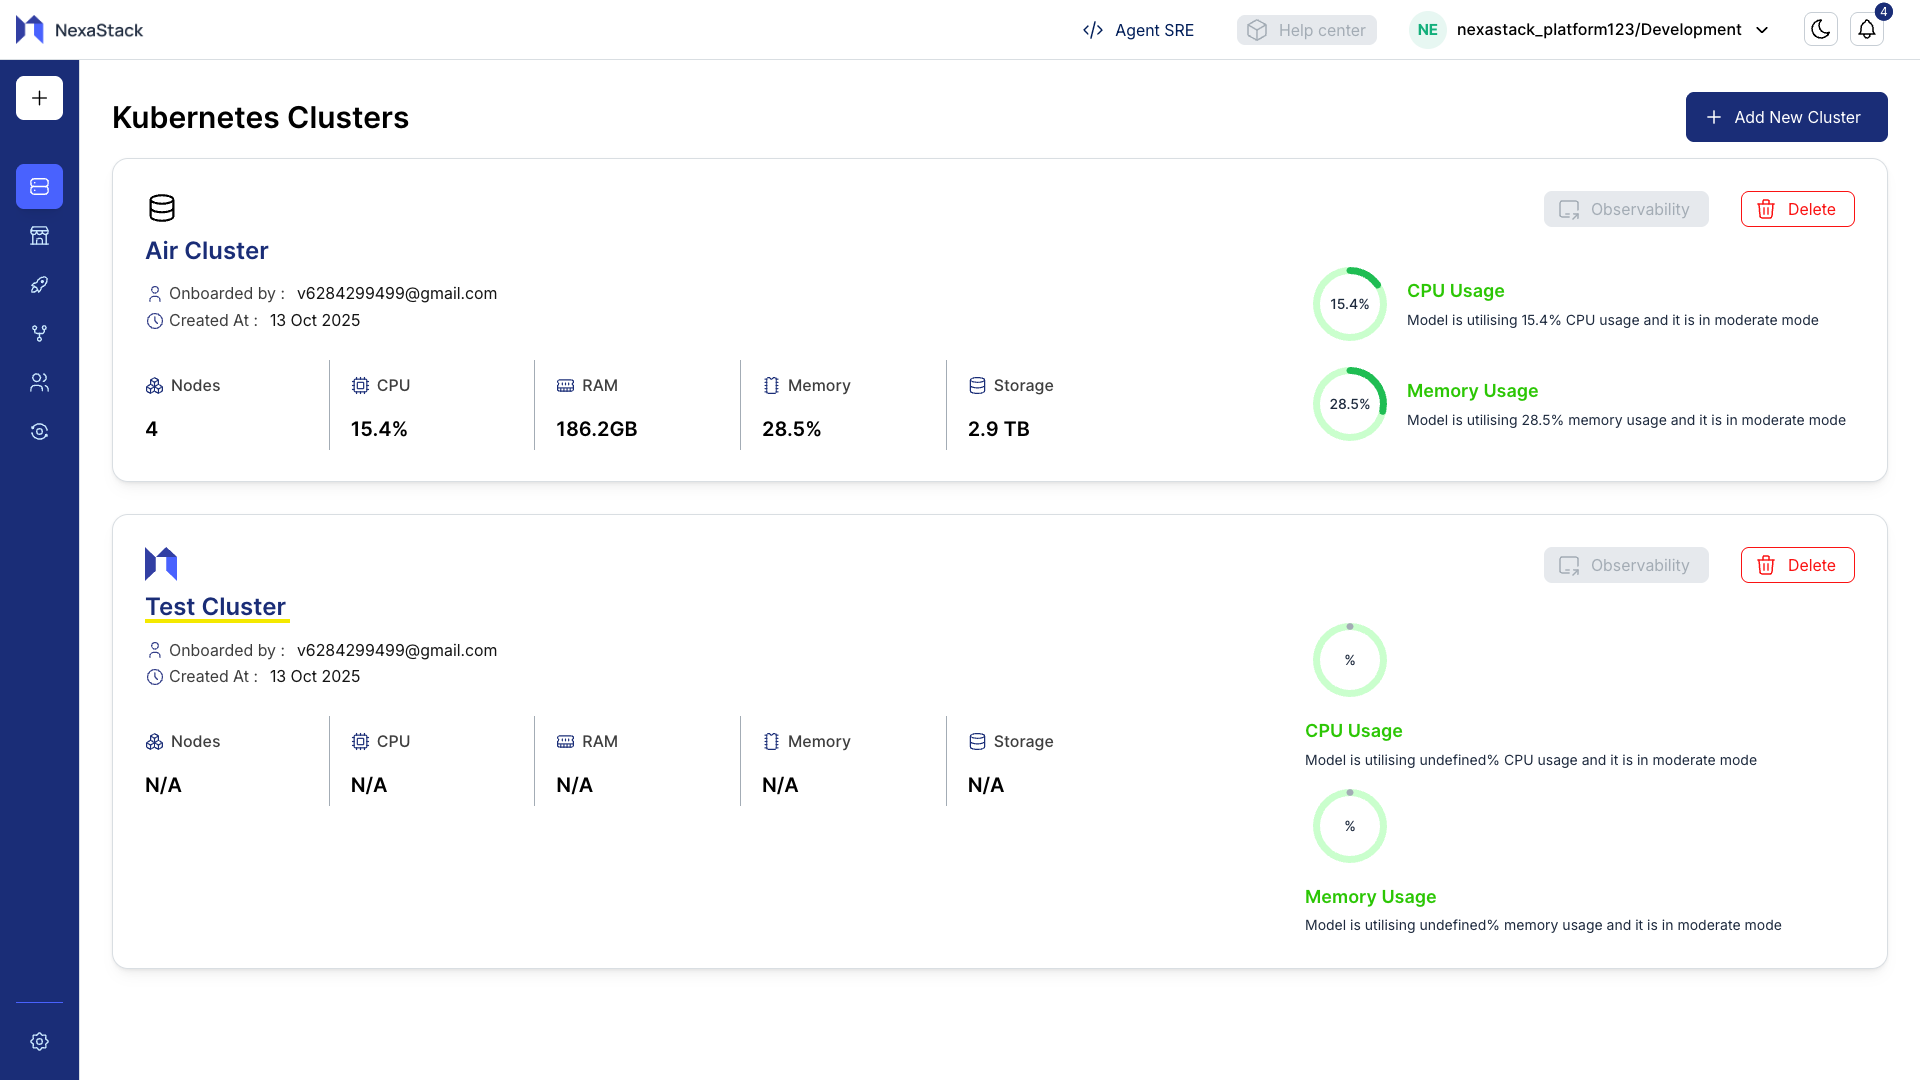
Step 4: Confirmation
Once the setup is complete:
- A success message will appear confirming that the cluster has been created.
- The newly created cluster will now be visible on the Kubernetes Clusters page with the status Active.

Your Nexastack-managed Kubernetes cluster is now successfully onboarded and ready for use.
You can immediately begin deploying models and monitoring workloads.
- The newly onboarded cluster will now appear on the Clusters page, displaying its name, type, and status.
Cluster Management Capabilities
Once your managed cluster is onboarded, you can:
- Deploy AI Models: Use the Model Deployment Guide to deploy models seamlessly.
- Monitor Health: Access integrated Prometheus and Grafana dashboards from the Nexastack interface.
- Scale Automatically: Leverage autoscaling capabilities for inference workloads.
- Access Logs and Metrics: View logs, resource usage, and event histories directly in Nexastack.
Best Practices
- Use Managed Clusters for Production: They are optimized for stability, performance, and uptime.
- Leverage Built-In Monitoring: Utilize built-in observability tools instead of setting up external monitoring stacks.
- Apply Resource Limits: Define clear resource limits for deployed services to optimize performance.
- Secure Access: Only authorized users should have access to the managed cluster within your workspace.
Next Steps
- Deploy your first model using the Model Deployment Guide.
- Explore monitoring options in the Clusters Dashboard.
- Onboard additional clusters (e.g., on-premises or Cloud) as needed for workload distribution.
Congratulations! 🎉
Your Nexastack-managed Kubernetes cluster is active and fully integrated into the platform.
You can now deploy AI models, monitor performance, and scale workloads — all through Nexastack’s unified interface.