Workspace Creation
After completing your registration, you'll be guided through a three-step process to set up your workspace and team.
The workspace creation process consists of three main steps that will help you set up your team and workspace efficiently.
Overview
The workspace creation process consists of three main steps:
- Team Details - Set up your team information
- Workspace Creation - Create and configure your workspace
- Add Members - Invite team members to your workspace
Step 1: Team Details
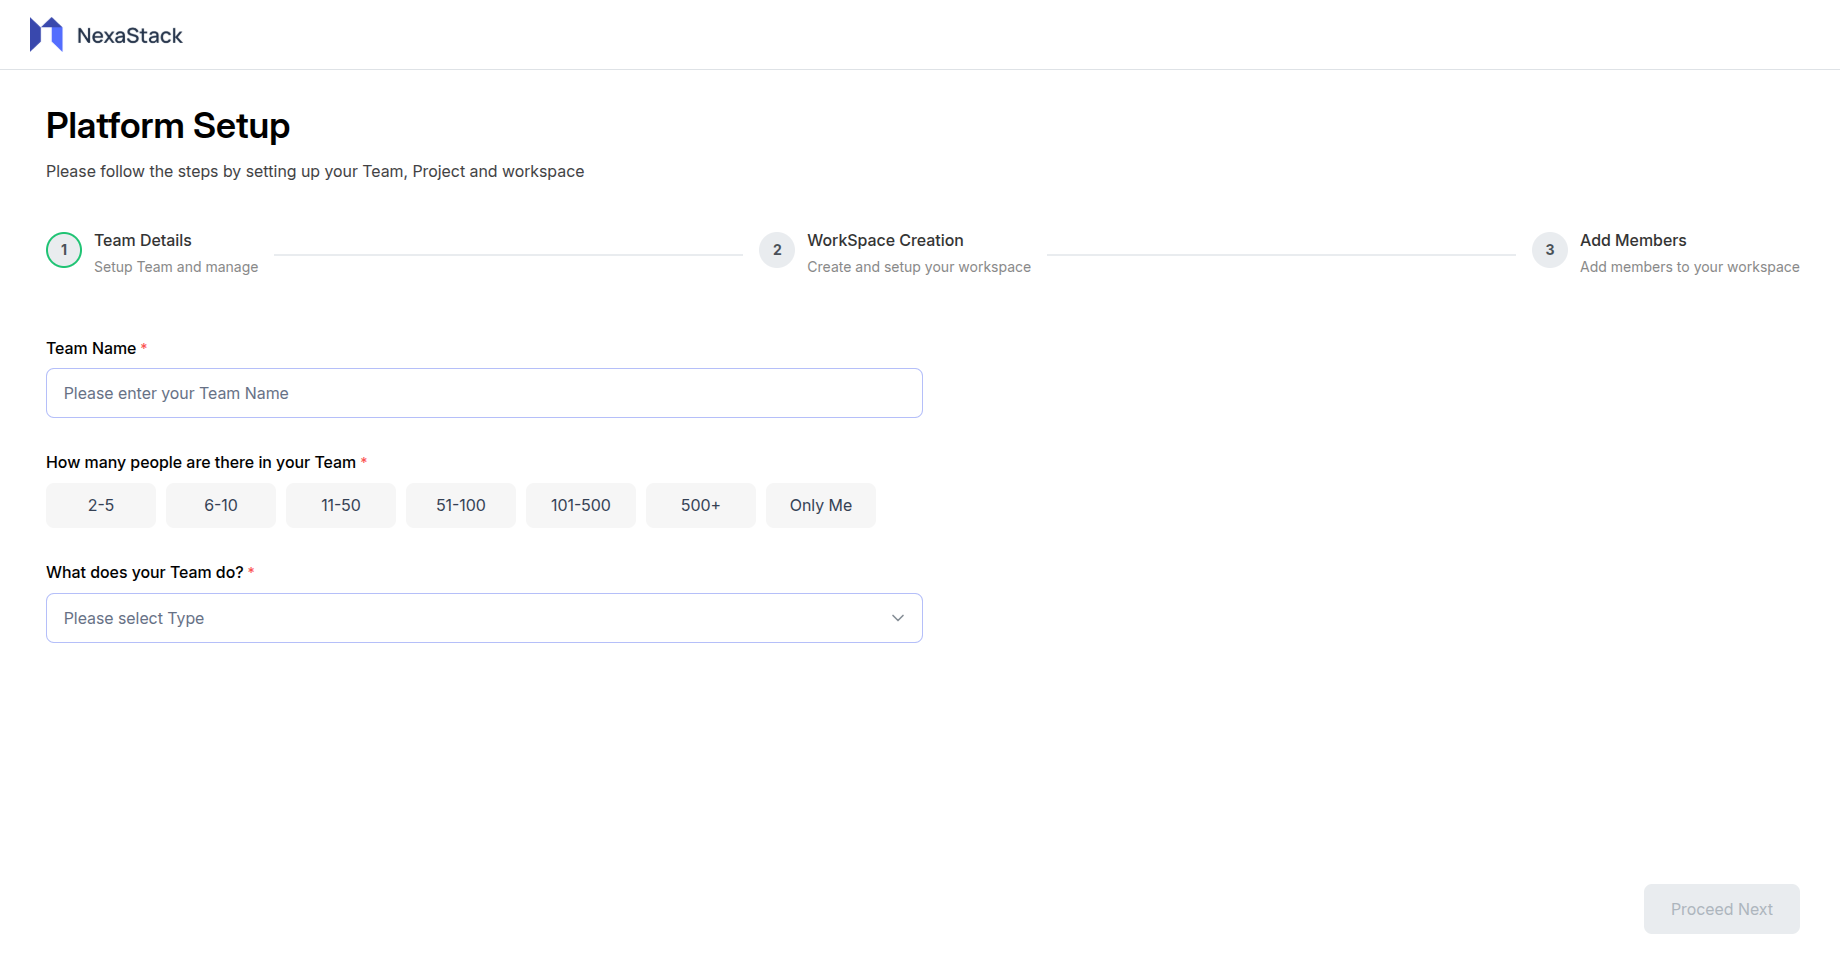
Team Information Setup
In this step, you'll provide essential information about your team and organization.
Required Fields
Team Name
- Enter your team or organization name
- This will be displayed across your workspace
- Choose a name that represents your team or company
Team Size
- Select the appropriate team size from the given options
Team Type
- Choose what your team does from the dropdown menu
Step 2: Workspace Creation
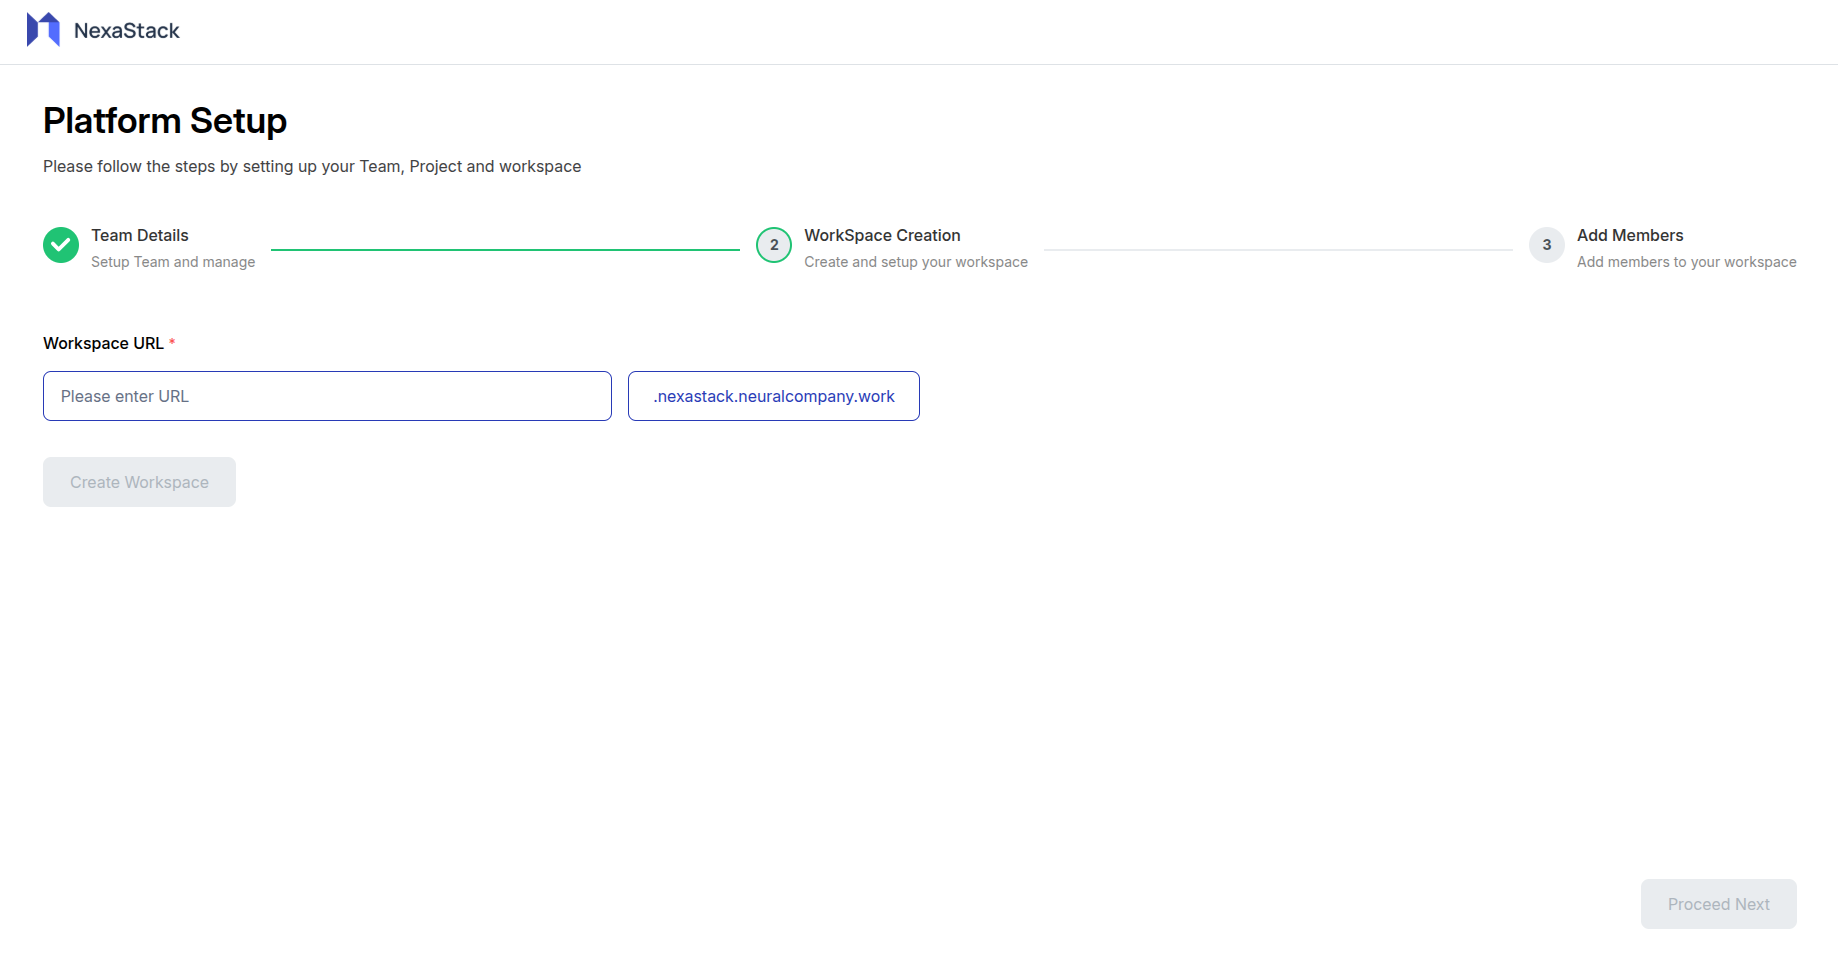
Workspace Configuration
Set up your workspace environment and preferences.
Your workspace URL must be unique across the platform and cannot be changed once created.
Workspace Settings
Workspace URL
- Enter your desired workspace URL in the "Workspace URL" field
- Choose a unique, memorable URL that represents your workspace
- The URL will be used for accessing your workspace
Important Notes:
- The workspace URL must be unique across the platform
- Once created, the URL cannot be changed
Step 3: Add Members
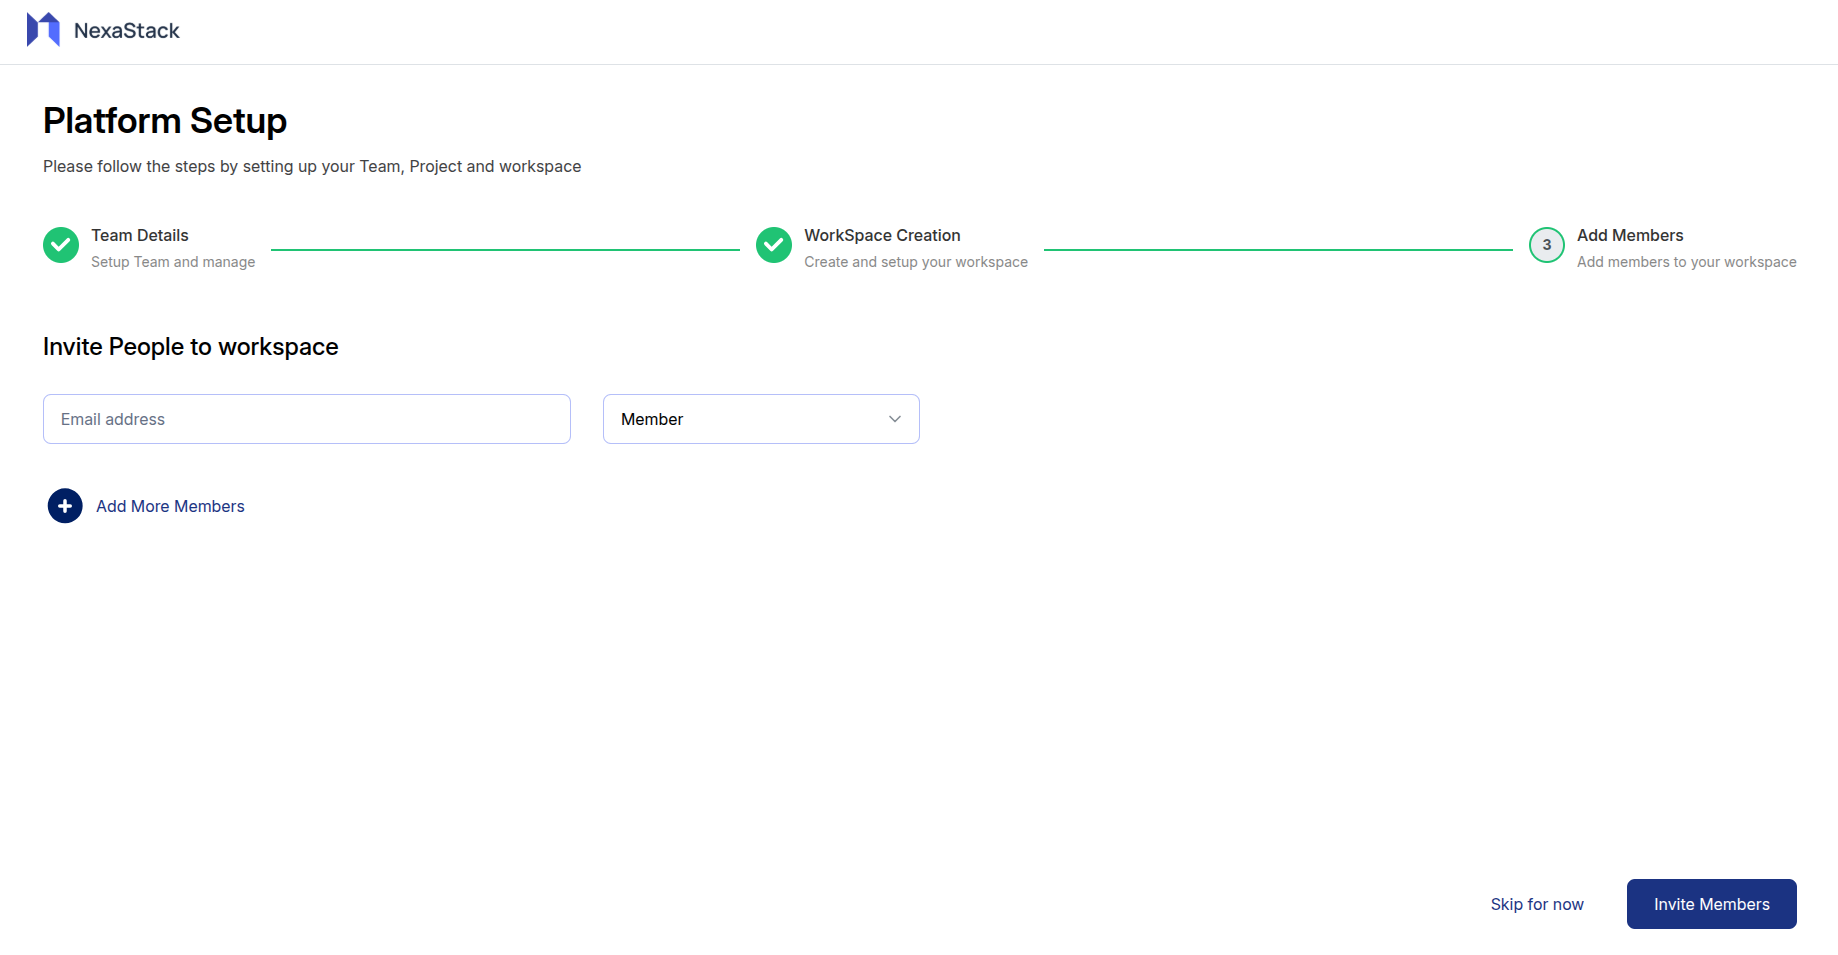
Team Member Management
Invite team members to join your workspace.
This step is optional. You can skip it now and add members later from your workspace settings.
Invitation Form
Email Address
- Enter the email address of the person you want to invite
- The system will send an invitation email to this address
- Make sure the email address is correct and active
Member Role
- Select the appropriate role from the dropdown menu
- Available roles:
- Member: Standard workspace access with project participation
- Admin: Full workspace access with administrative privileges
Adding Multiple Members
- Use the "Add More Members" button to invite additional team members
- You can add multiple rows for different team members
- Each member can be assigned a different role
Optional Actions
Skip for Now
- You can skip this step if you want to add members later
- Use the "Skip for now" link at the bottom left
- You can always invite members after workspace creation
Invite Members
- Click "Invite Members" button to send invitations
- All entered email addresses will receive invitation emails
- Members will be able to join using the invitation links
You've successfully completed the workspace creation process! Your workspace is now ready for your team to start collaborating.
Post-Creation Experience
Automatic Login
After completing the workspace creation process, you'll be automatically logged into your new workspace. No additional authentication is required - you can start using your workspace immediately.
Default Project Creation
As part of the onboarding process, a default project is automatically created for you:
This default project serves as a starting point and allows you to:
- Explore the project interface
- Test basic functionality
- Understand the workspace layout